One of the first requirements a person does to test a camera is to look into the viewfinder to take a photo. They then review the image on the LCD screen to verify if the image meets their expectation. Without realizing, they may have not paid attention to the settings of the viewfinder which can impact the quality of the image.
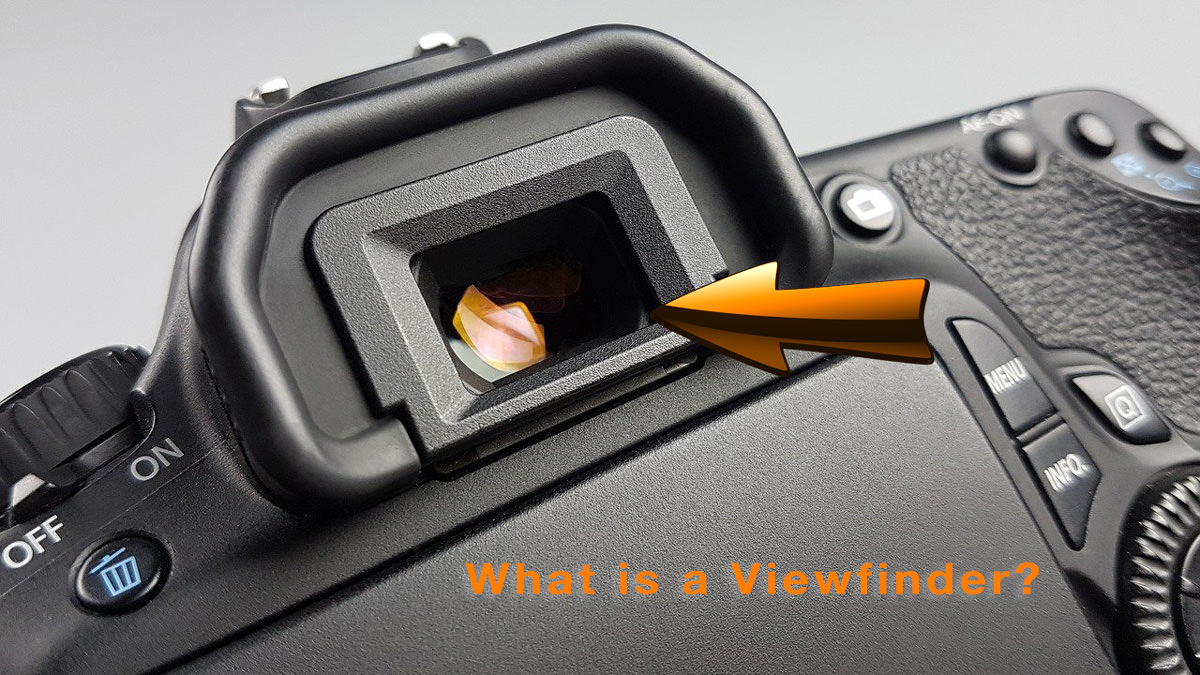
The camera viewfinder is a small, rectangular display window found on top of the camera which a person looks through to help them compose a photograph. What you see in the viewfinder is ideally what the camera sees and the image that will be captured by the image sensor.
The viewfinder plays an important part in photography as it helps photographers to accurately aim and make an image.
How the Optical Viewfinder Works
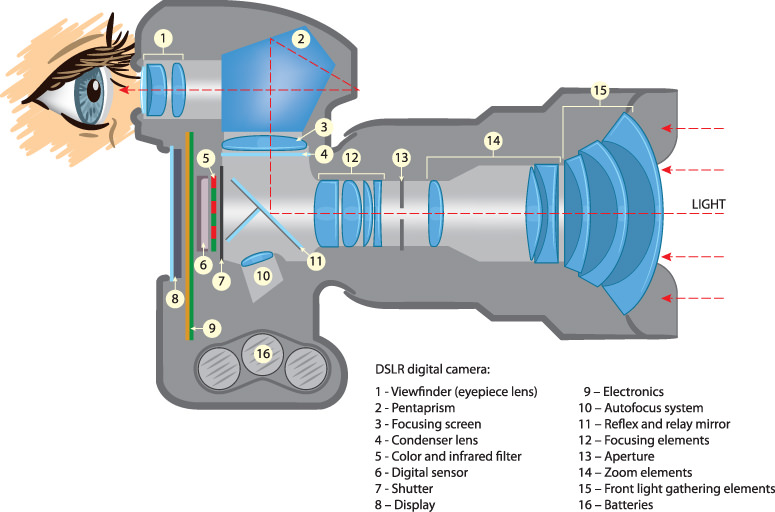
DSLRs use an optical viewfinder (OVF). This is accomplished by light passing through the lens (TTL) and reflecting off a reflex or relay mirror, then passing through a pentaprism or pentamirror, and ultimately going through the viewfinder into the photographer’s eye.
The benefit of the optical viewfinder is you see what the camera sees. The light that goes through the lens reaches your eye and helps you frame the image correctly.
Additionally, the viewfinder also displays important information. The focal points displayed in the image finder helps you autofocus the image in real time. Many camera models also display the camera settings in the viewfinder – aperture, shutter speed, and ISO – you know your exact settings when you press the shutter button.
And an unrealized advantage of looking through the viewfinder is having the camera body and lens pressed up against your body by bringing in your arms: this helps you stabilize your camera to reduce hand shake and produce sharper images.
Pentaprism vs Pentamirror
Professional-grade DSLRs use a pentaprism which is made up of a solid, 5-sided prism which reflects light. On the other hand, lower-grade DSLRs use a pentamirror which is designed with mirrors and has air in the middle. Pentaprisms are heavier and cost more money to construct than a pentamirror.
The advantage of a pentaprism is there is less light reduction through the reflection stage resulting in a brighter image in the viewfinder.
Not all viewfinders are optically constructed the same. Some compact cameras have a parallel view: what you see is different from the light that passes through the lens and what the camera sees. These types of viewfinders lack a pentaprism or pentamirror and the final image is slightly different than what was displayed in the viewfinder. This difference is known as parallax.
Why is the Viewfinder Blurry?
Just because you may have 20:20 vision or corrected vision doesn’t mean there is something wrong with the viewfinder. Often times when you first look into a viewfinder, the image may be blurry. This is because the focus of the viewfinder has not been adjusted to your eyes, glasses, or contacts.
The viewfinder has a small dial or knob known as the dioptric adjustment, usually found right beside it, to adjust the focus. The dioptric adjustment allows fine-tuning of the viewfinder focus and can be adjusted to a photographer’s eyesight. Most cameras allow a standard correction range of -3 to +1 diopters.
Electronic Viewfinder
A common viewfinder design is the electronic viewfinder (EVF) or also known as a digital viewfinder. It works by the image sensor capturing light and displaying the information on a small electronic display in the viewfinder.
An overlooked difference between an optical vs electronic viewfinder is battery consumption. An OVF consumes no powers. Whereas an EVF continuously consumes power while it’s on. This can be an inconvenience when traveling with spare batteries is required.
What is Live View
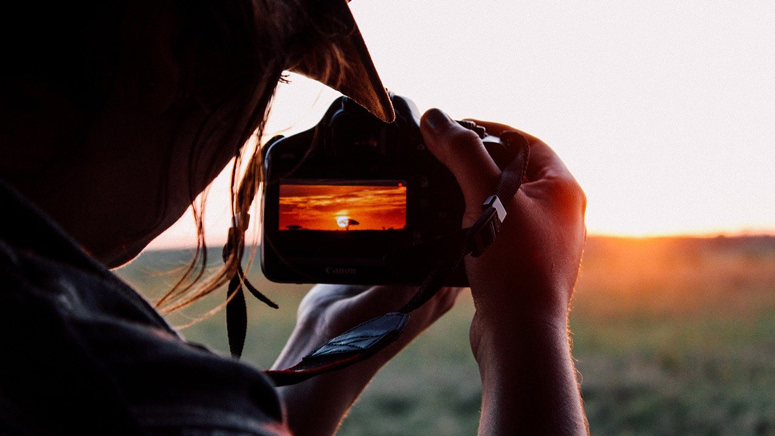
Similar to an electronic viewfinder, live view is the preview you see on the back of a camera’s larger display, the LCD (liquid crystal display). Live view and EVF are sometimes used interchangeably.
Most people use the camera LCD to view the camera settings, but some photographers prefer live view due to the larger screen.
The live view is a lifesaver when you to need to preview your composition in tight spots. Let’s say you need to photograph an image that requires your camera to be close to the ground, and you don’t want to lie down on the ground to look through the viewfinder. Well, the live view feature comes in handy in these kinds of situations.
Many camera modes also have LCD screens that flip out and can be rotated. This improves the live view angle of visibility and makes capturing images easier in tight spots.
However, just like how the EVF consumes powers, the live view consumes even more power because of its larger display and the energy required to display the bright screen.
On a bright and sunny day, live view will be difficult to see because of the glare on the LCD. It’s best to use the viewfinder in this case if possible.
A notable disadvantage of the live view is if you are using it while handheld, the camera will be way from your body while your arms are slight stretched, this will cause camera shake and blurry images. Live view is more effective with a tripod.
Another method of using live view on your camera is to connect it with your smartphone using Wi-Fi or Bluetooth. This is a common practice with action cameras like the GoPro.
Viewfinder Coverage and Magnification
On an optical viewfinder, sometimes what you see is not what the camera will photograph. This is due to the viewfinder coverage amount being less than 100%. When the coverage amount is less than 100%, for example 95%, you’re only seeing 95% of the actual image. This is because there is not enough space in a DSLR to construct the viewfinder to have 100% coverage. Different camera models have different coverage amounts, so you’ll need to check the specifications.
Unwanted areas in your image due to a viewfinder coverage amount less than 100% can easily be cropped away in post-processing.
The viewfinder magnification is a number indicating the size of the image you see in the viewfinder relative to what you would see with the naked eye. The amounts are usually between 0 and 1 and uses a 50mm lens as the benchmark. So, when a viewfinder has a 1X magnification, it means what you see in the viewfinder with a 50mm lens will be the same size as if you were looking at the object with your own eyes.

Hola Parceros,
I’m the founder of Aperlust. I enjoy web development and SEO and am into snowboarding and linguistics. In my spare time, you can find me destroying my opponents in chess across the globe.