![HDRsoft Photomatix Review – 15% OFF Coupon Code [Updated 2024]](https://aperlust.com/wp-content/uploads/2018/05/photomatix-review-2024.jpg)
Last updated on March 11th, 2024
HDRsoft is one of the pioneers of HDR photography with its Photomatix Pro and Essentials software. Professional photographers and enthusiasts were merging bracketed photos in Photomatix long before HDR was available in Lightroom and Luminar Neo. In this Photomatix review, I’ll look at the pros and cons of version 7 and how well it performs in 2024.
What is Photomatix?
Photomatix debuted in 2003 to merge HDR bracketed photos. The principle is you take bracketed photos with your DSLR or mirrorless camera using the automatic exposure bracketing (AEB) tool.
Generally, you take three photos consisting of normally exposed, overexposed, and underexposed photos and merge them with HDR software. Some photographers push the limits and take five or seven bracketed photos. But I usually stick with three: RAW files take up too much space.
Related: How to take bracketed photos with an iPhone
Photomatix Coupon Code: aperlustphoto
15% discount
Pros:
- Includes Photoshop, Lightroom Classic, and Capture One plugins.
- Adjust images using exposure fusion or tone mapping.
- Standalone photo-editing software.
- Presets are included.
- The license can be installed on several computers and is limited to one user.
Cons:
- Overwhelming if you have never used photography software.
- Better to combine the software with Photoshop for maximum aesthetic creativity.
Photomatix Review
The main purpose of using Photomatix is to brighten the shadows and darken the highlights in high-dynamic lighting conditions using bracketed photos through exposure fusion or tone mapping. In addition, many photographers use it to give images a visually creative pop, especially in landscapes and cityscapes, in my case. Let’s break down how the software works.
Photomatix uses 1 of 2 methods for the HDR process:
Exposure Fusion blends the bracketed photos in such a way as to make the shadows and highlights viewable. This method involves taking the shadows from the overexposed source image and the highlights from the underexposed source image and fusing them into one LDR (low dynamic range) image.
Tone Mapping is a bit more complicated. First, it merges the photo into a 32-bit/channel unprocessed HDR image, which can’t always be displayed on monitors or prints correctly. Second, tone mapping transposes the HDR image into an LDR (low dynamic range) image in order to be displayed or printed.
Note: When we say an HDR image, it’s actually an LDR image that was fused with source images from a high-dynamic scene. But the process is called HDR photography, fusion, or tone mapping.
If you use other image-editing software, then learning how to use Photomatix will be easy as it has some similar adjustment settings like contrast, saturation, and temperature. It’s especially easier for Lightroom and Photoshop users since Photomatix comes with plugins for them. The LR plugin allows you to export your photos from Lightroom to Photomatix and then import the HDR image from Photomatix to Lightroom without the need for a file folder.
There is also a Photomatix plugin for Capture One.
However, some adjustments are advanced, and I can’t remember exactly what they all do, such as micro smoothing. Photomatix combats this problem by displaying an information box explaining the functionality of each adjustment.
New Features in Photomatix Pro 7:
- Batch process images with previews
- Save ghosting masks as a preset to apply to future images of the same scene
- Add a watermark to your image (not that big of a deal)
- Save your HDR image as a 32-bit DNG file
Using Photomatix Pro 7
In order to fully utilize Photomatix, you should have at least three bracketed photos, preferably in RAW format, but JPGs also work.
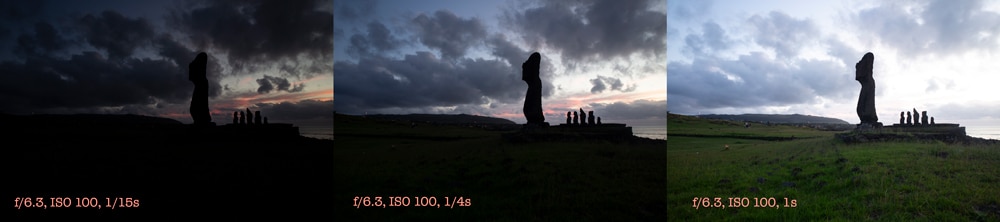
The three images below were photographed in Hanga Roa, Easter Island, with automatic exposure bracketing at f/6.3, ISO 100, and shutter speeds of 1/15, 1/4, and 1 second. The relative exposure values (EV) to the normal exposure (0.8 s) image are ±2 (I’m hoping my f-stop calculations were correct; if not, let me know in the comments below).
To create the HDR image, upload your bracketed images into Photomatix, make your adjustments, and save the final file as JPEG OR TIFF. The Lightroom plugin comes in very handy here since Photomatix will import the HDR image into the LR library.
1. Upload Bracketed Photos
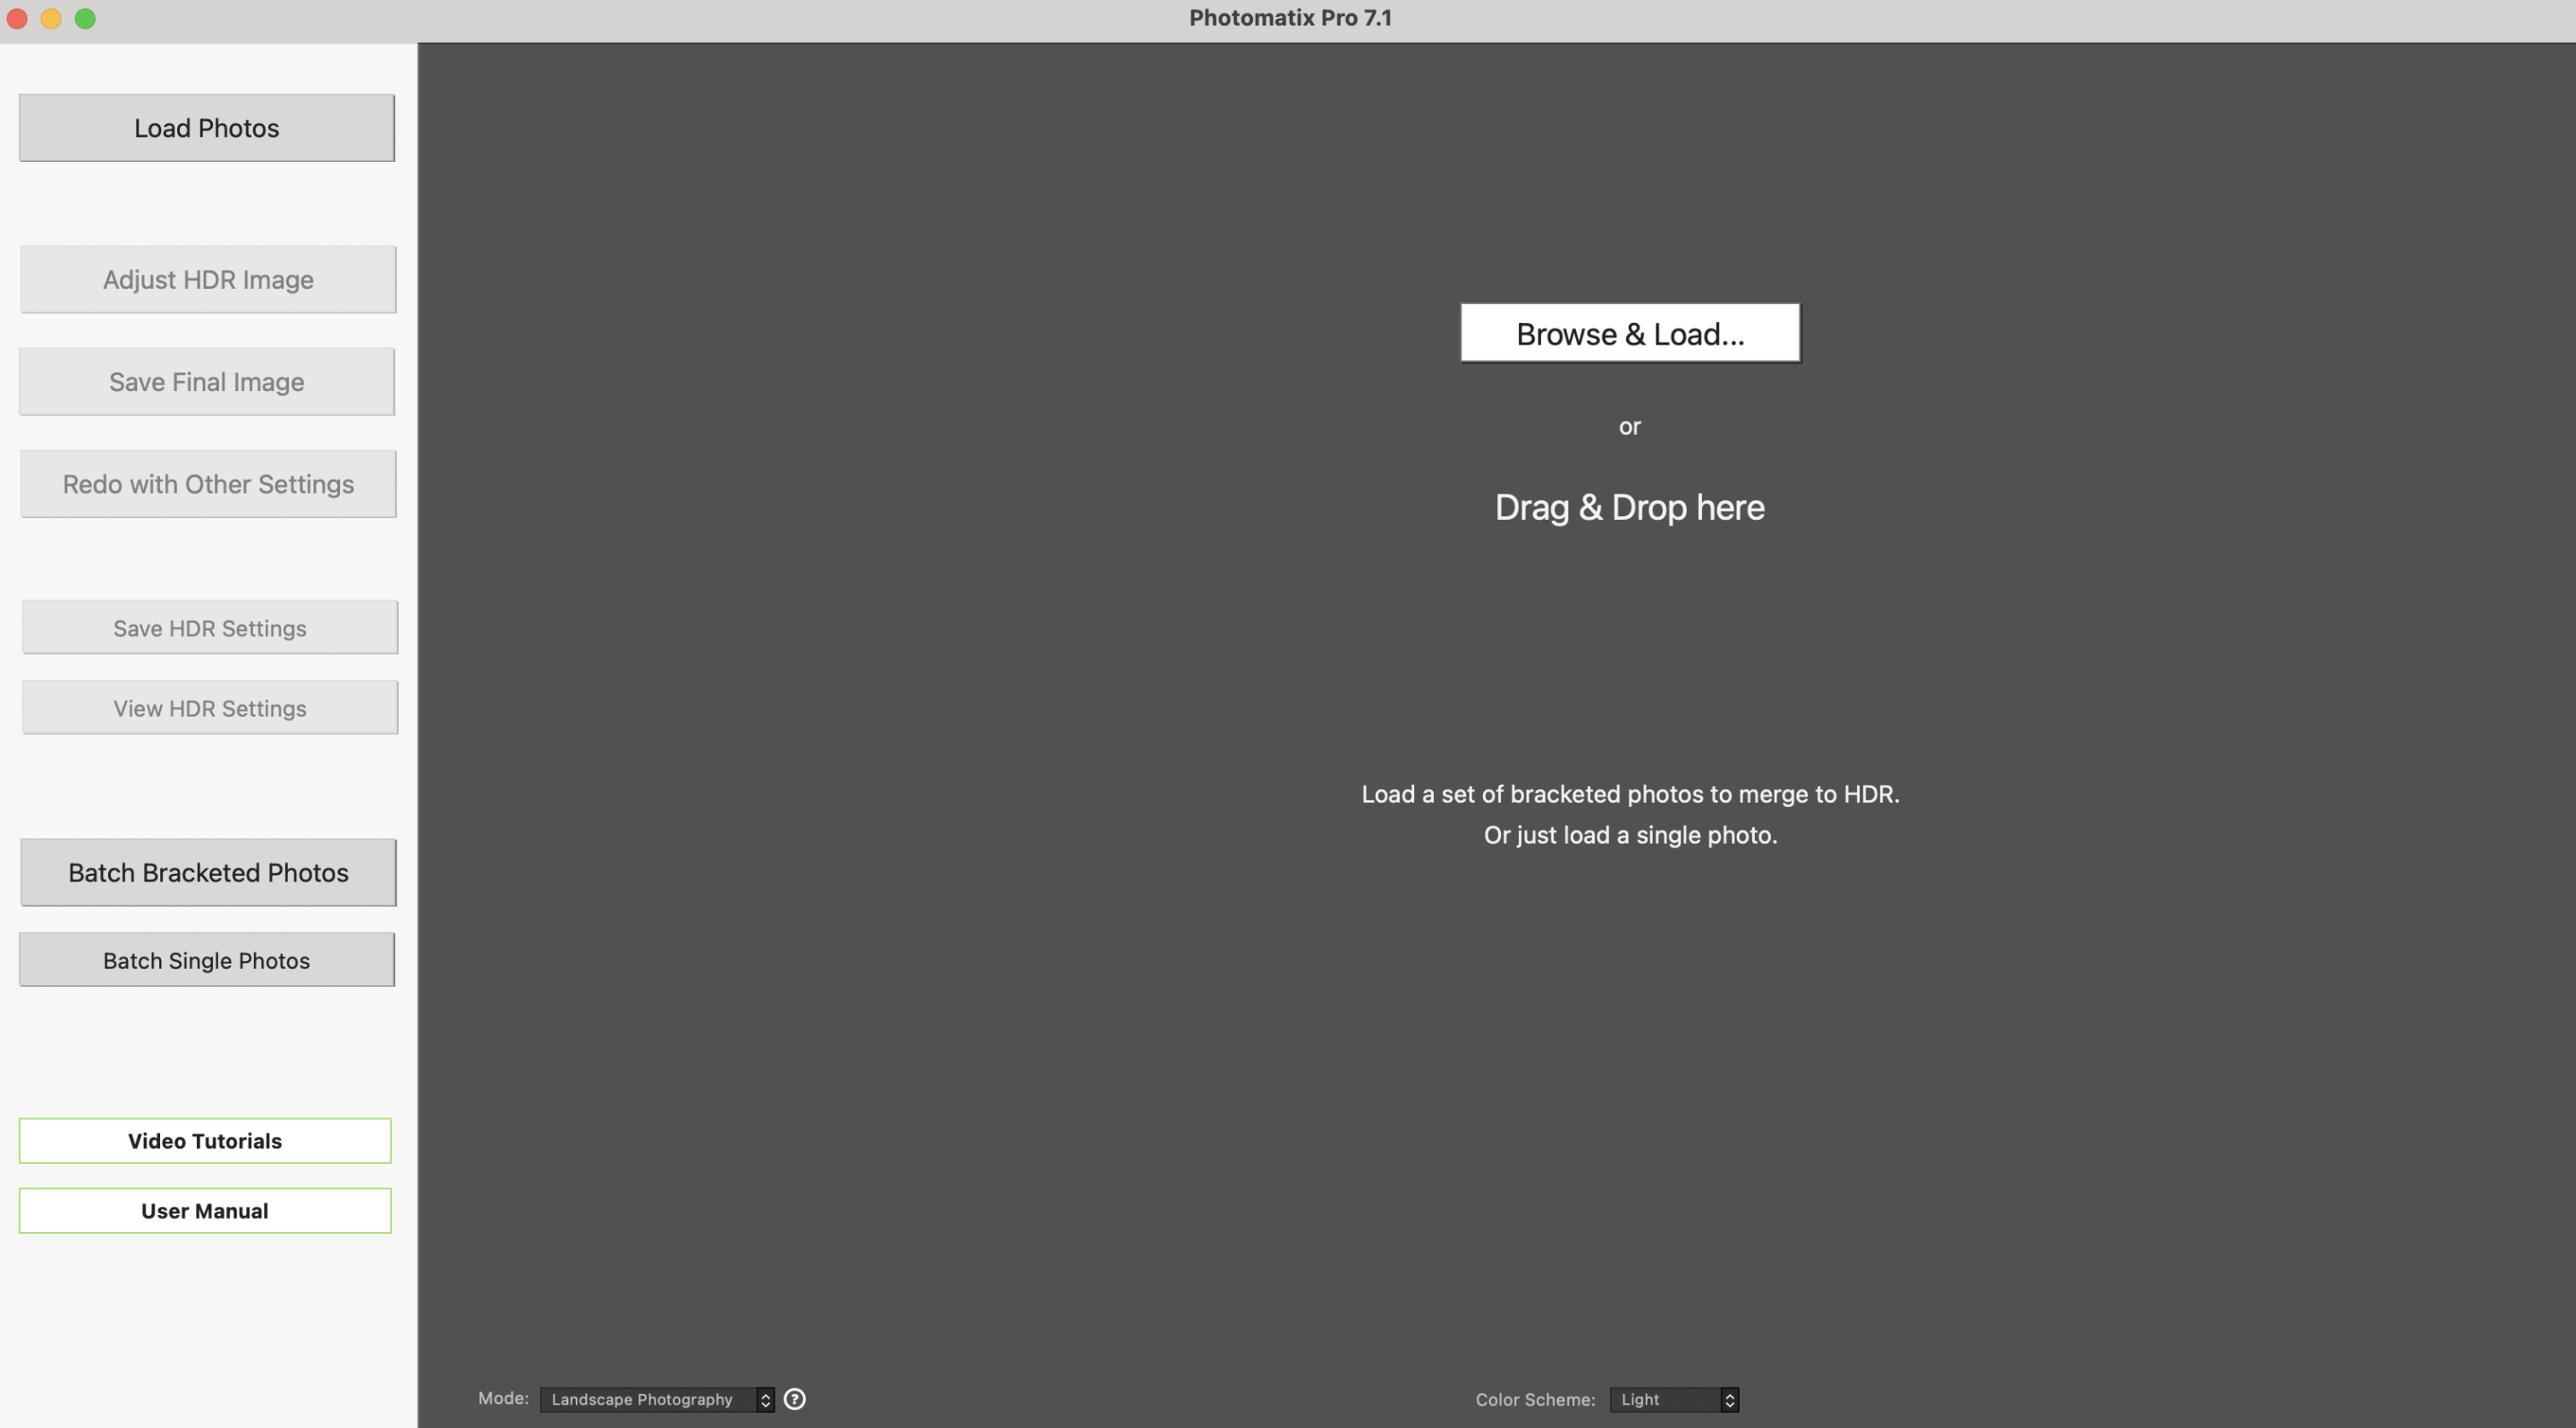
Uploading your bracketed photos in Photomatix is straightforward. You can drag-and-drop your photos onto the platform or search of individual files using the Windows Explorer or Mac Finder.
One thing to remember is to set the Photomatix Mode. You can see the options at the bottom when uploading photos. It allows you to select landscape or real estate photography.
There’s also another option called photogrammetry (I never knew this word existed) mode for engineering and scientific applications; I would be interested in seeing the photographers that use this.
2. Preprocess Settings
Photomatix Pro 7 has a few options before merging.
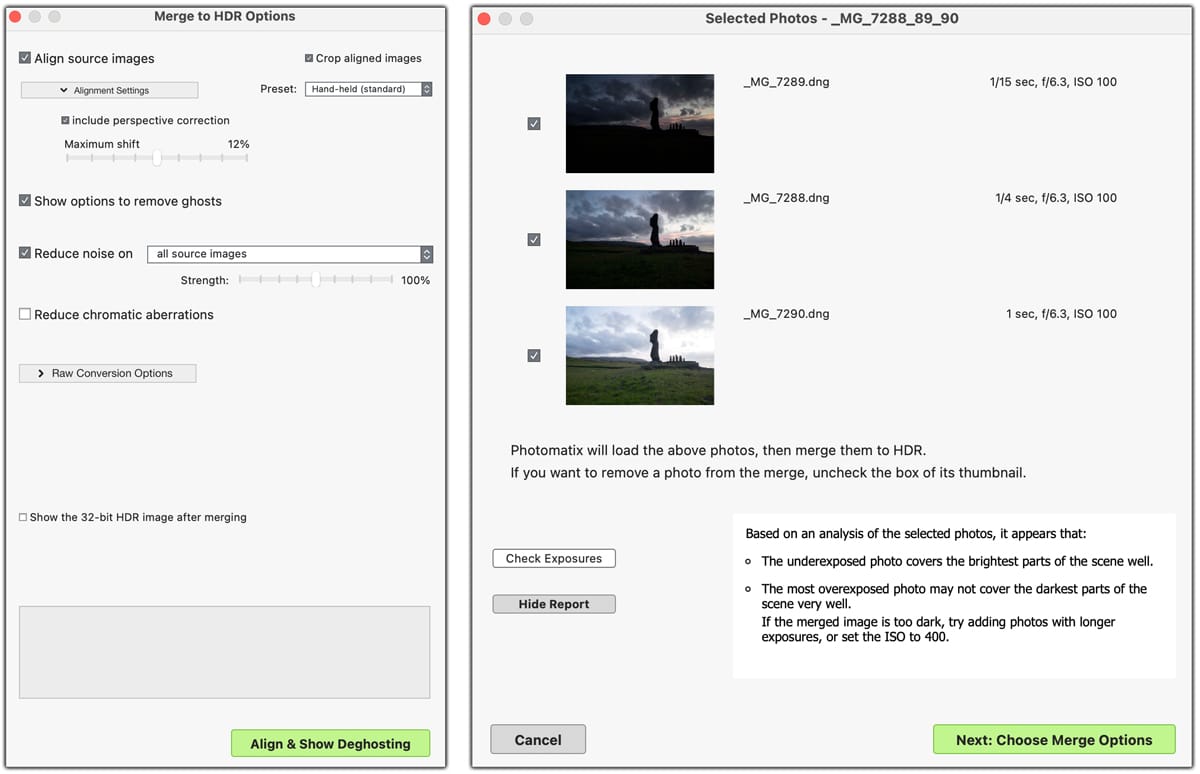
- Image Alignment Options: It’s not always easy to take aligned bracketed images. Photomatix comes with four auto alignment options depending on the camera setup: on a tripod and three handheld presets (minimal movement, standard, and large shifts). Photomatix also corrects for perspective shifts.
Tip: Use the handheld preset for bracketed photos taken on a tripod, but on a windy day, tripods can still shake. - Ghost Removal: Merged bracketed photos with moving objects cause unwanted artifacts. Examples of this would be people, animals, clouds, and leaves. As a result, Photomatix comes with manual and automatic deghosting options to avoid these artifacts. If you’re doing architecture photography in busy touristy areas, deghosting will be a great feature.
- Reduce Noise and Chromatic Aberrations: Noise removal and color-fringe reduction are nice-to-haves; however, Lightroom easily solves these problems prior to exporting to Photomatix. Personally, I wouldn’t use these features unless you don’t have a main image editor. Also, the noise reduction on Photomatix isn’t that great.
- 32-bit HDR image: If you want to view and save the 32-bit image, mark the checkbox.
3. Deghosting Options
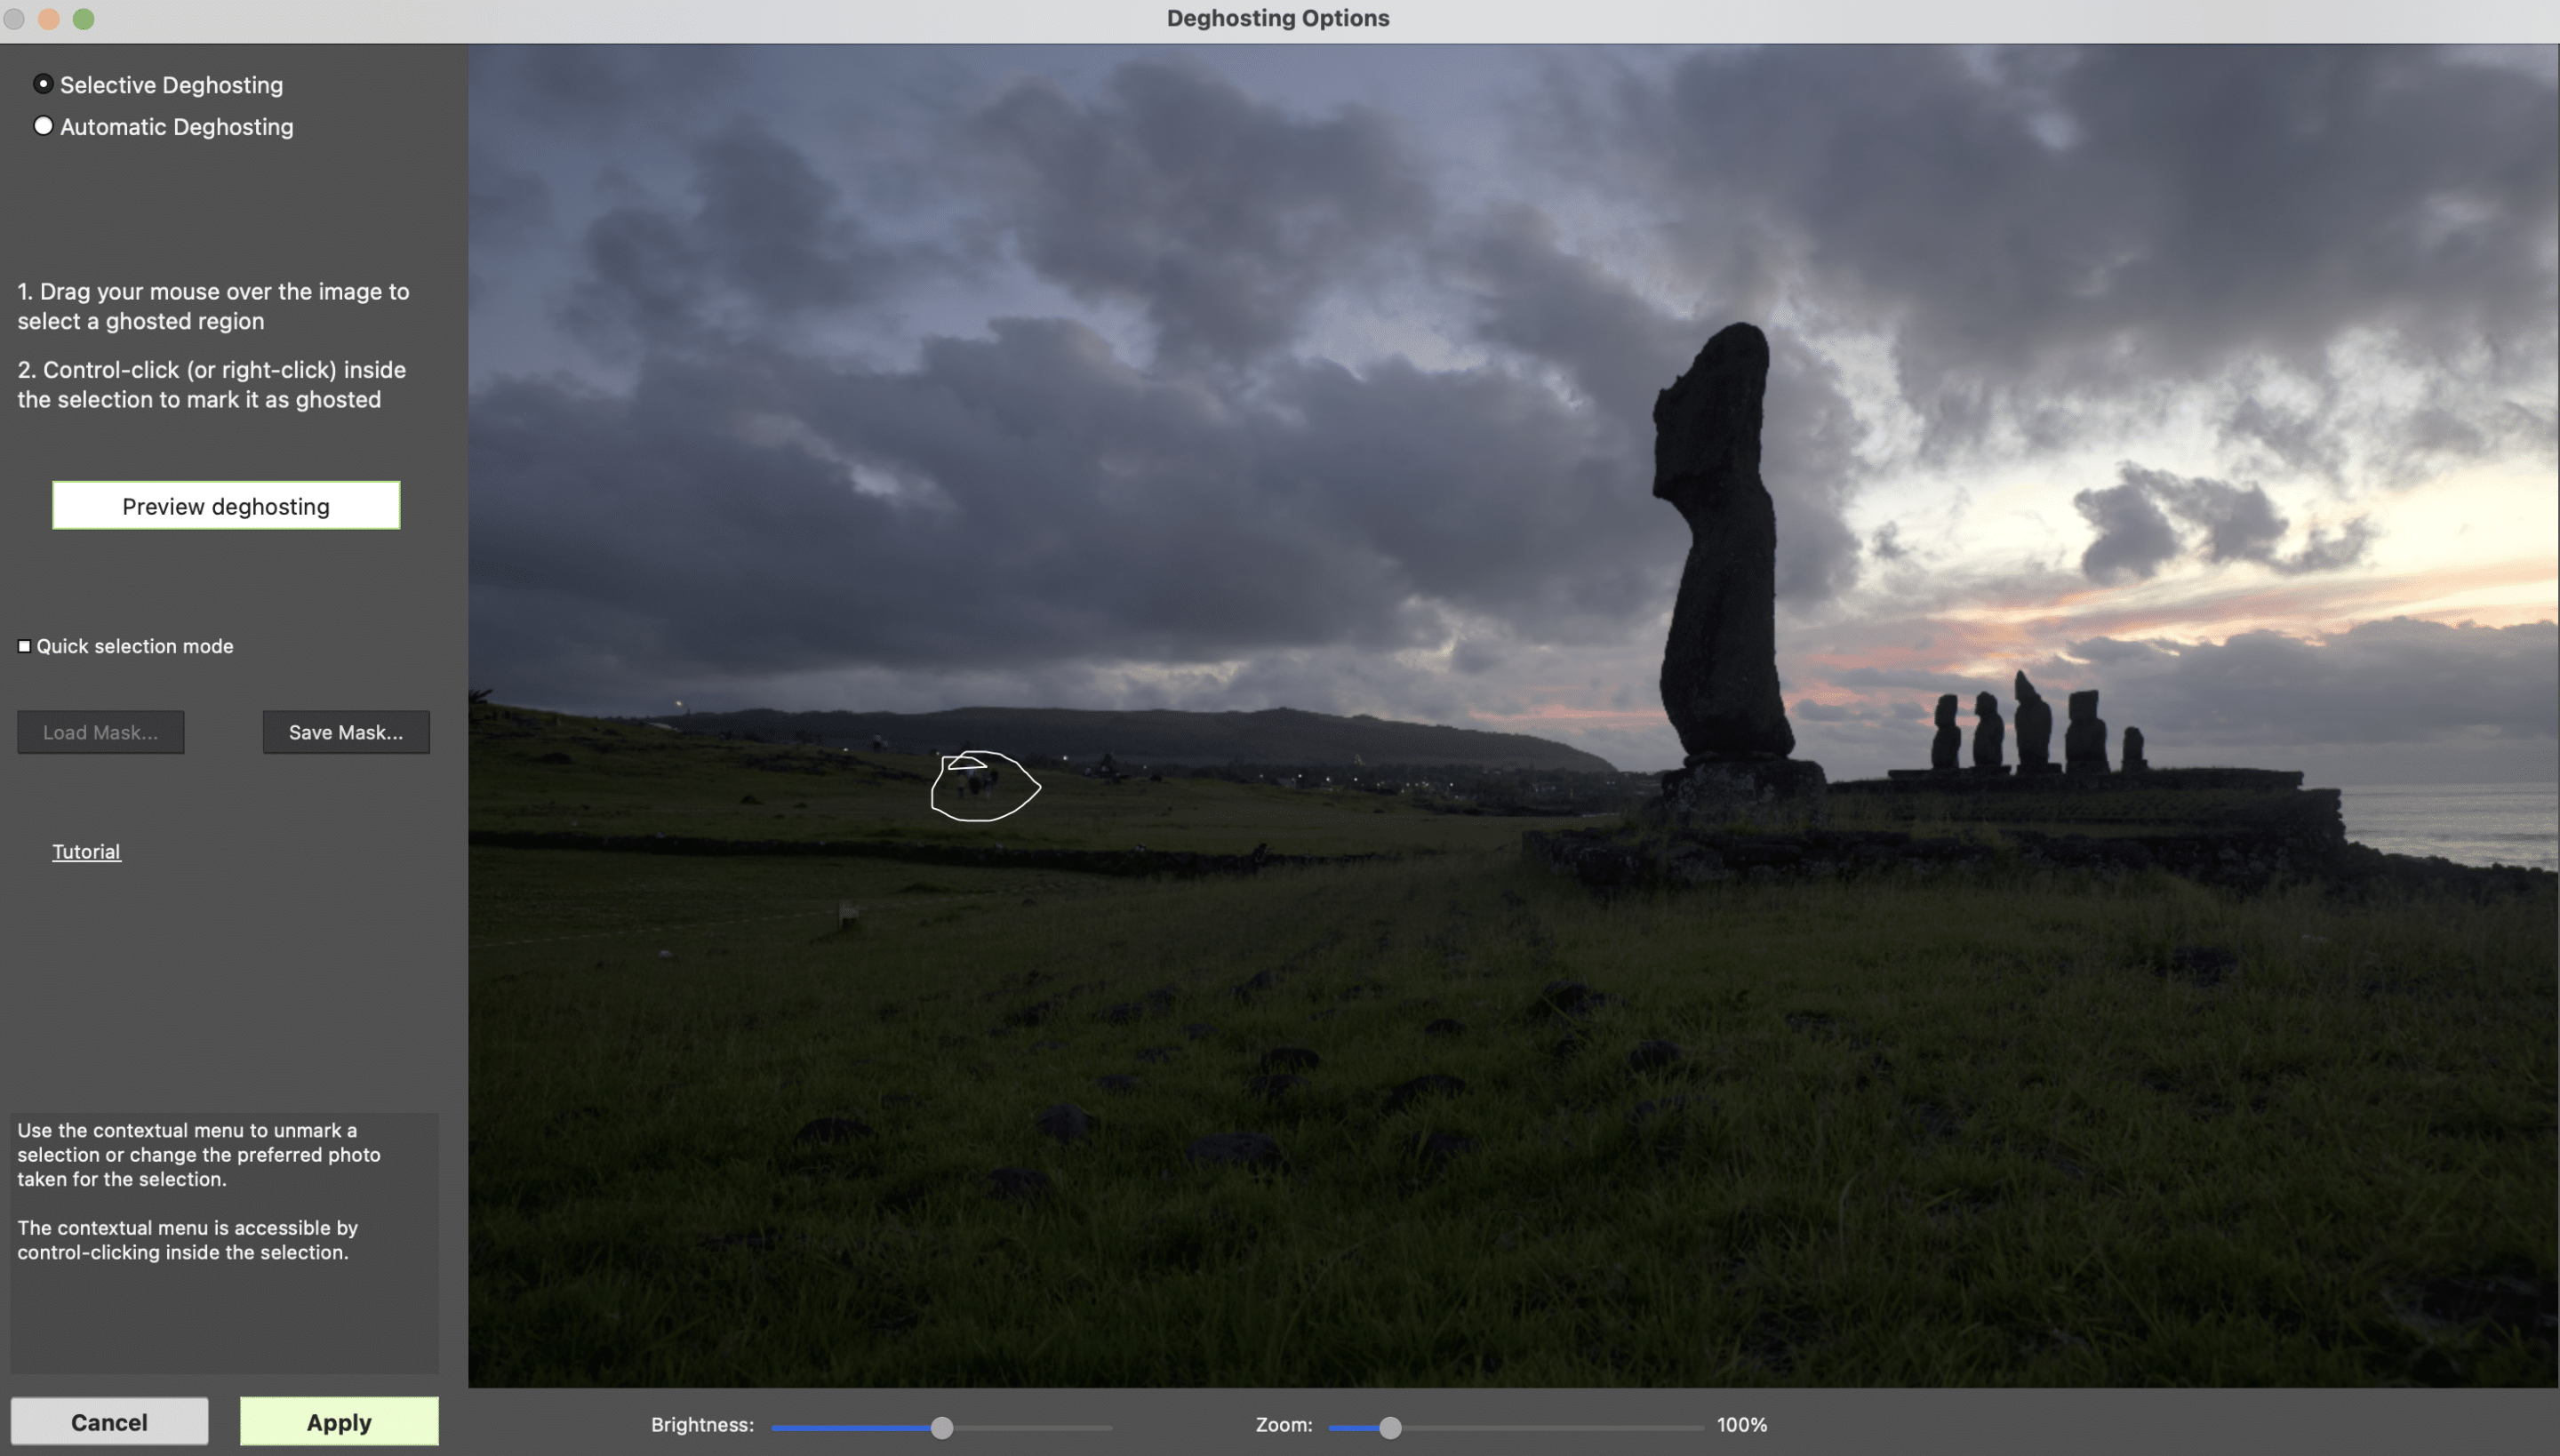
The next window that loads is the deghosting option if you select deghost. Manual selective deghosting is more accurate but takes longer. To make a manual selection, you draw a circle around the ghosted area and confirm it.
You can see in the below image the people I selected for ghosting. Though in this photo, it didn’t matter if I used deghosting or not because eventually, I would remove them from the photo.
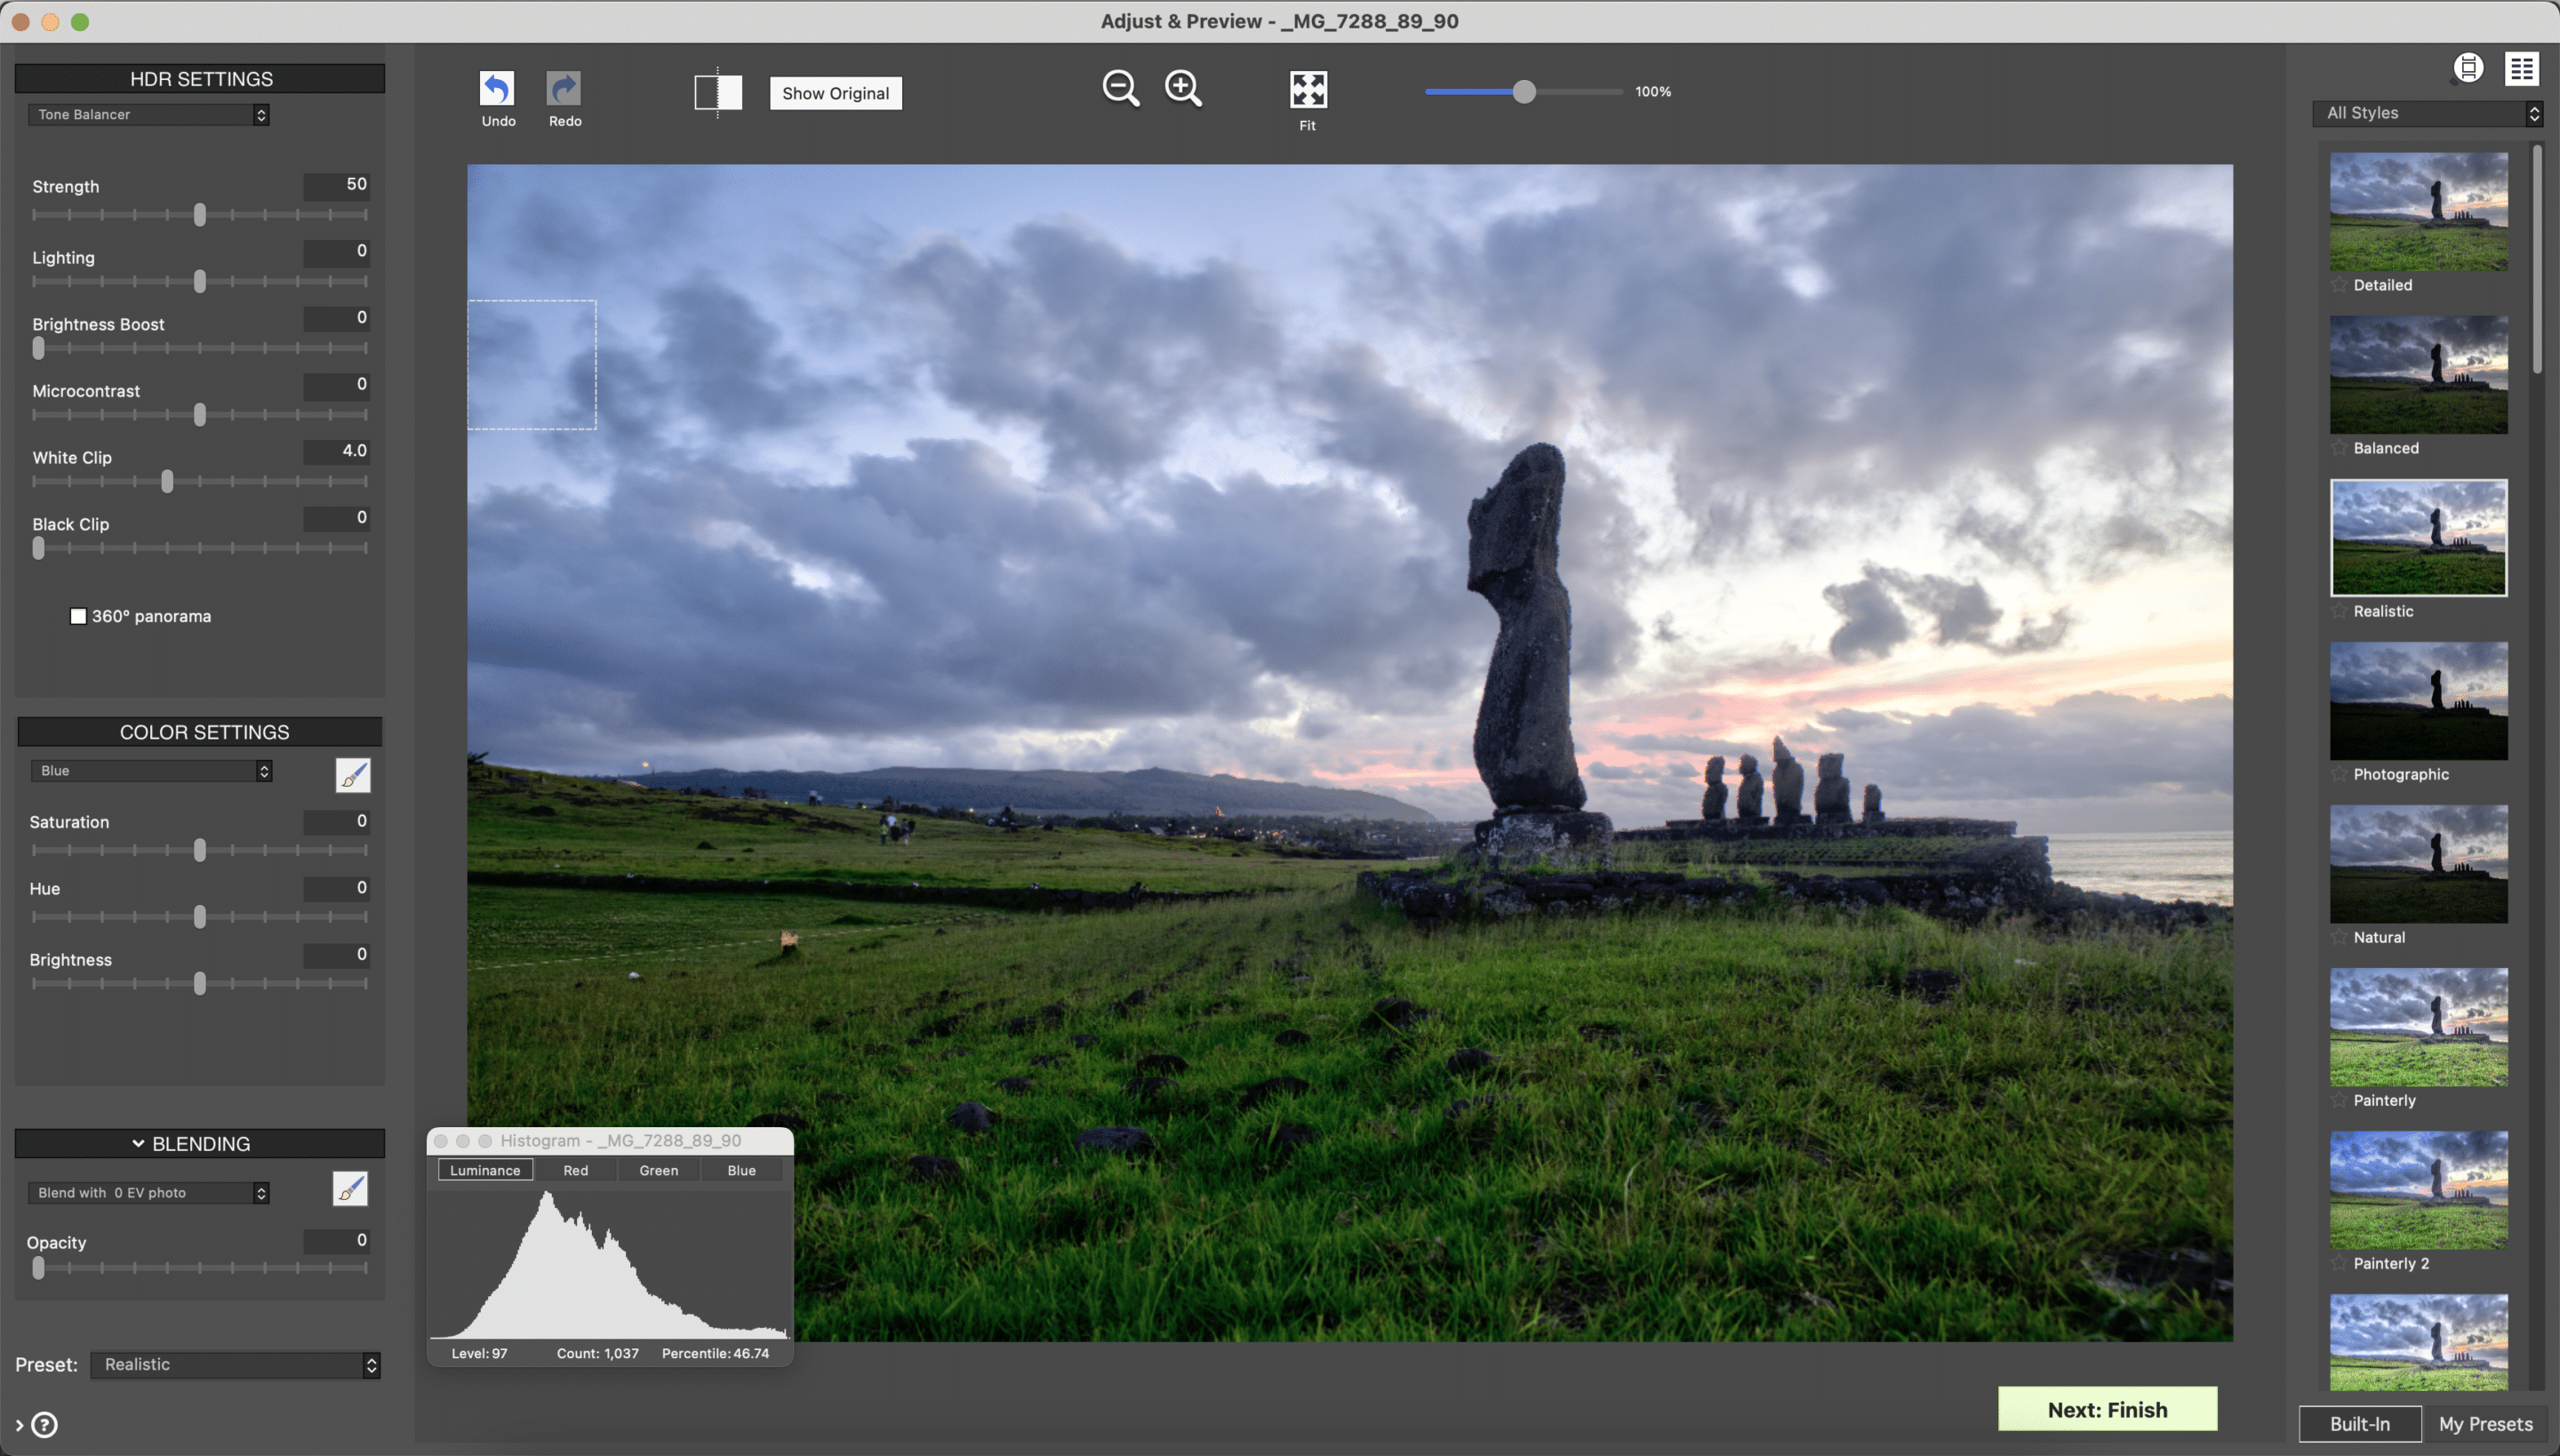
4. Adjust and Preview HDR Settings
Here is where you actually edit your HDR image. The left panel contains several adjustment options. The lower-left area provides information on each adjustment you hover your mouse over.
The right panel has presets, which are helpful. Sometimes, it’s better to start with a preset and then make adjustments.
Fine-tuning your HDR image takes time and practice.
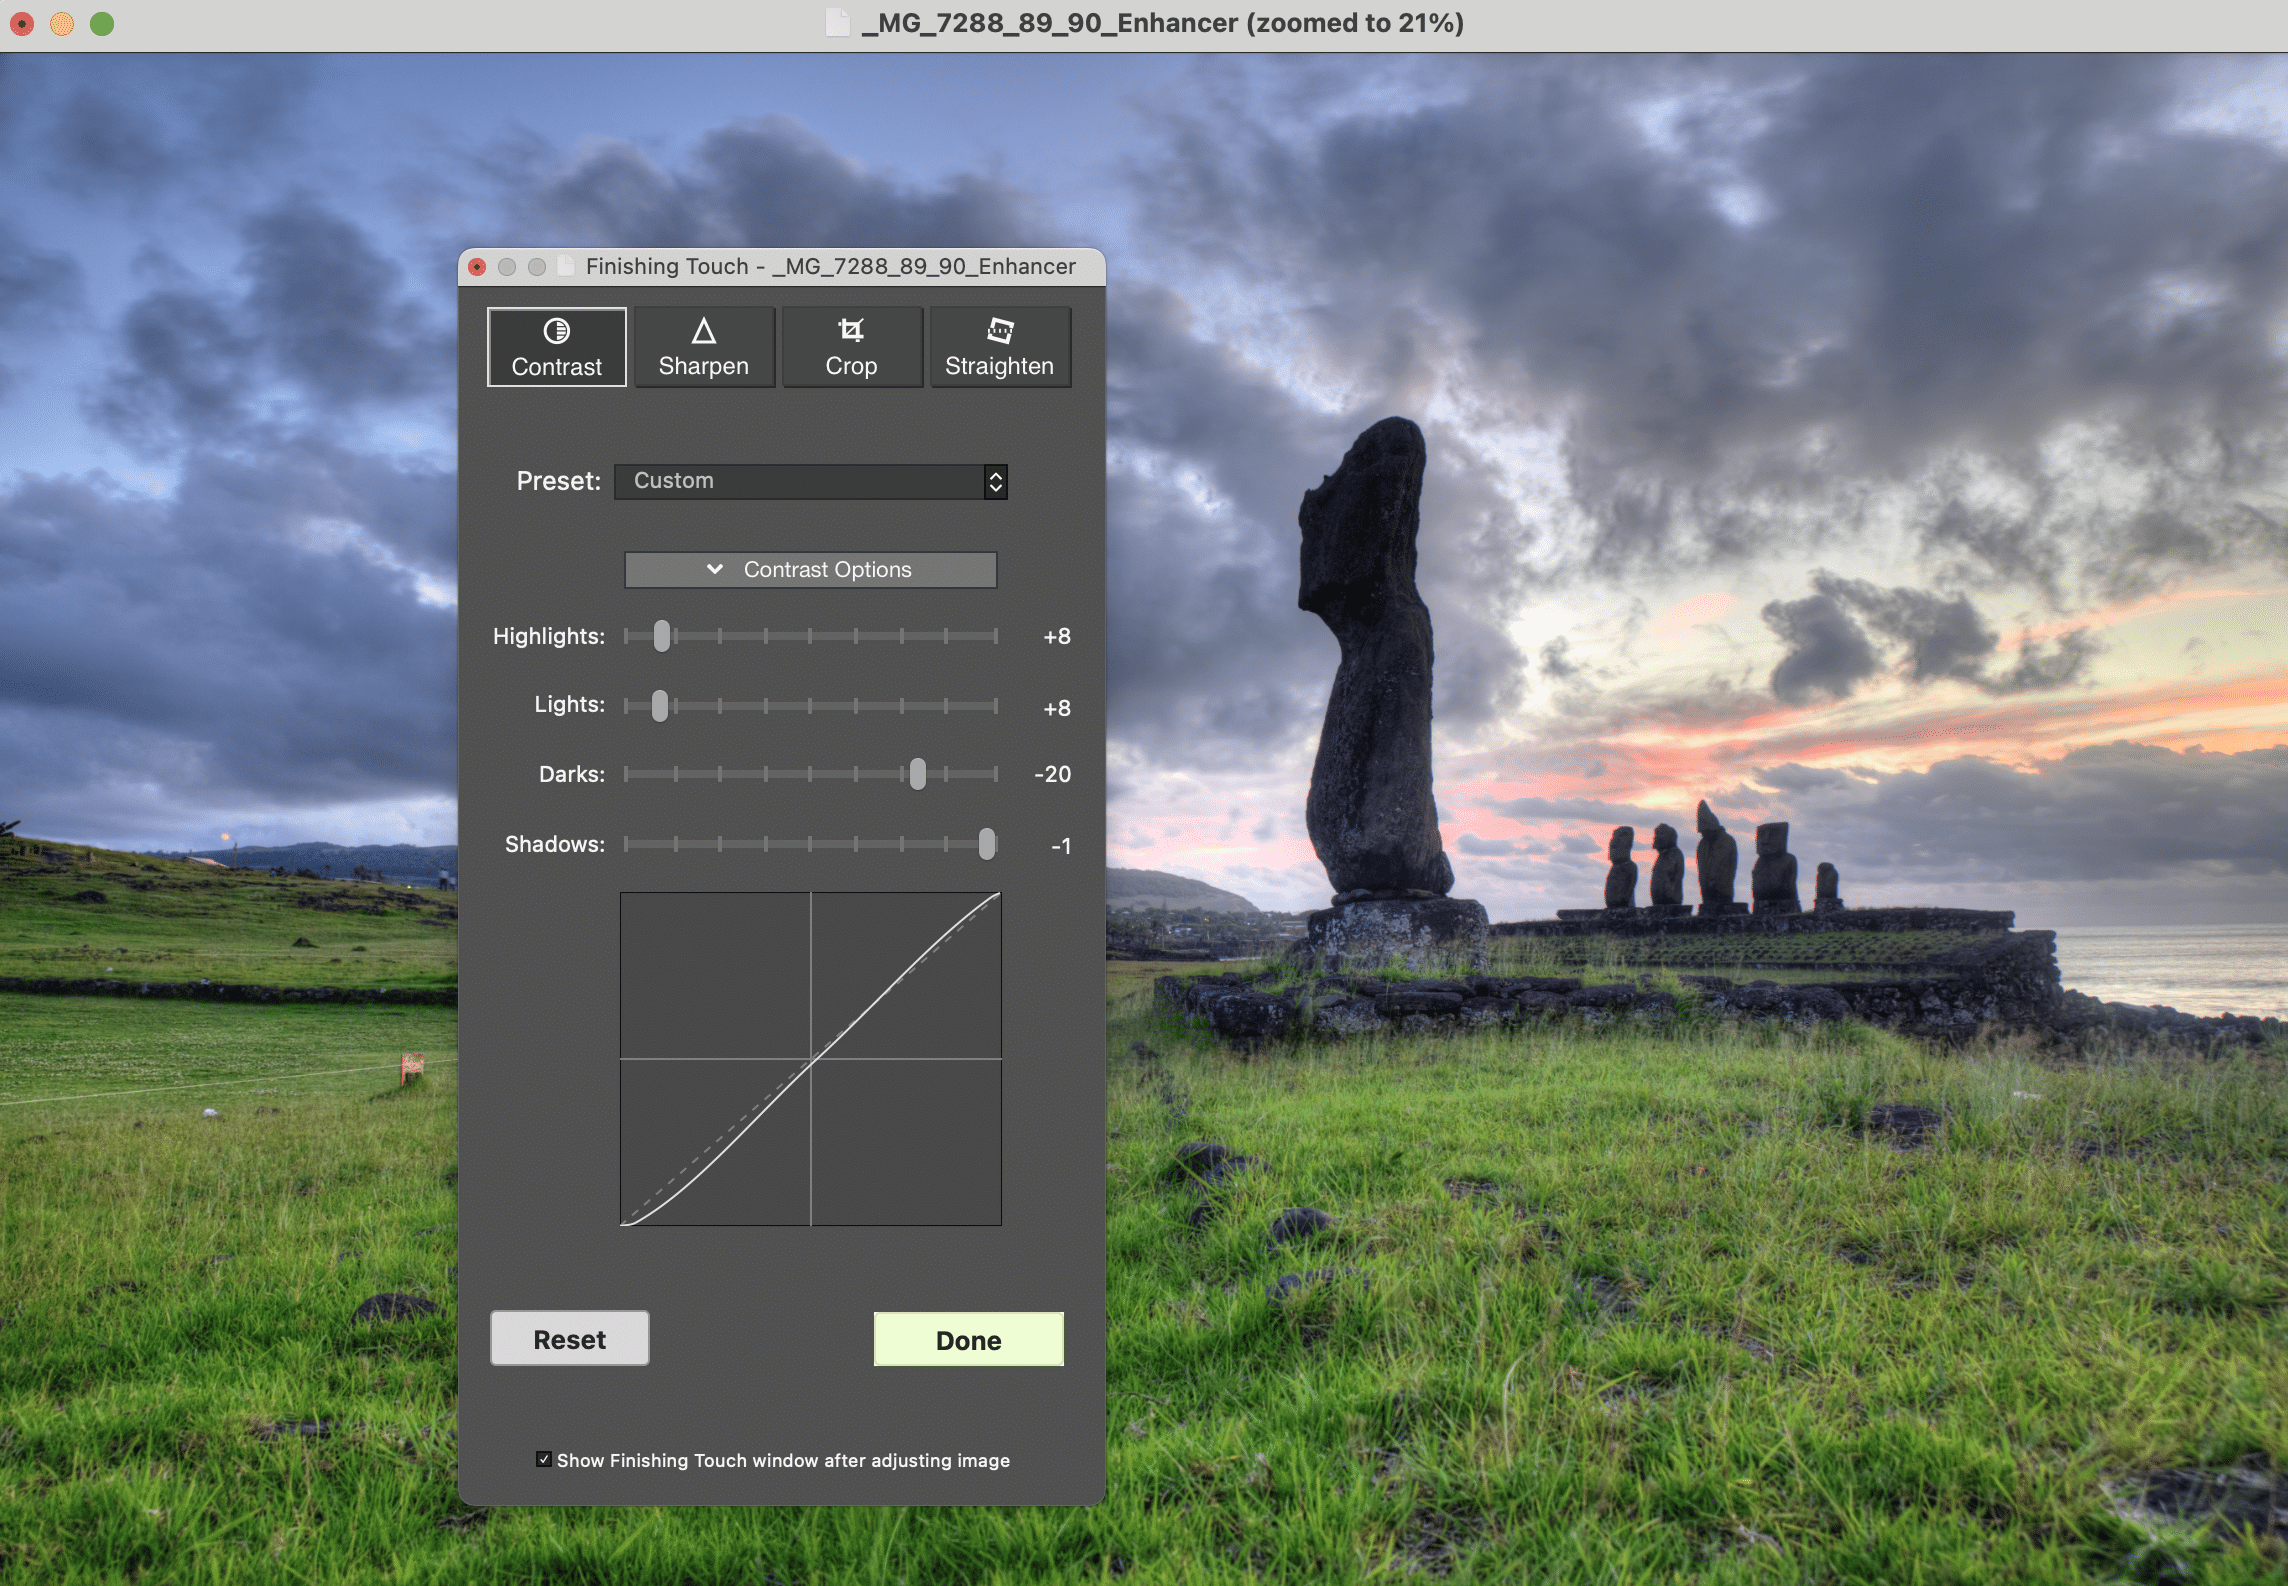
5. Finishing Touches
You can make final adjustments before saving or exporting the HDR image: contrast, sharpen, crop, and straighten. I prefer to make these types of adjustments in Photoshop or Lightroom.
HDR Time-Lapse Video Capability
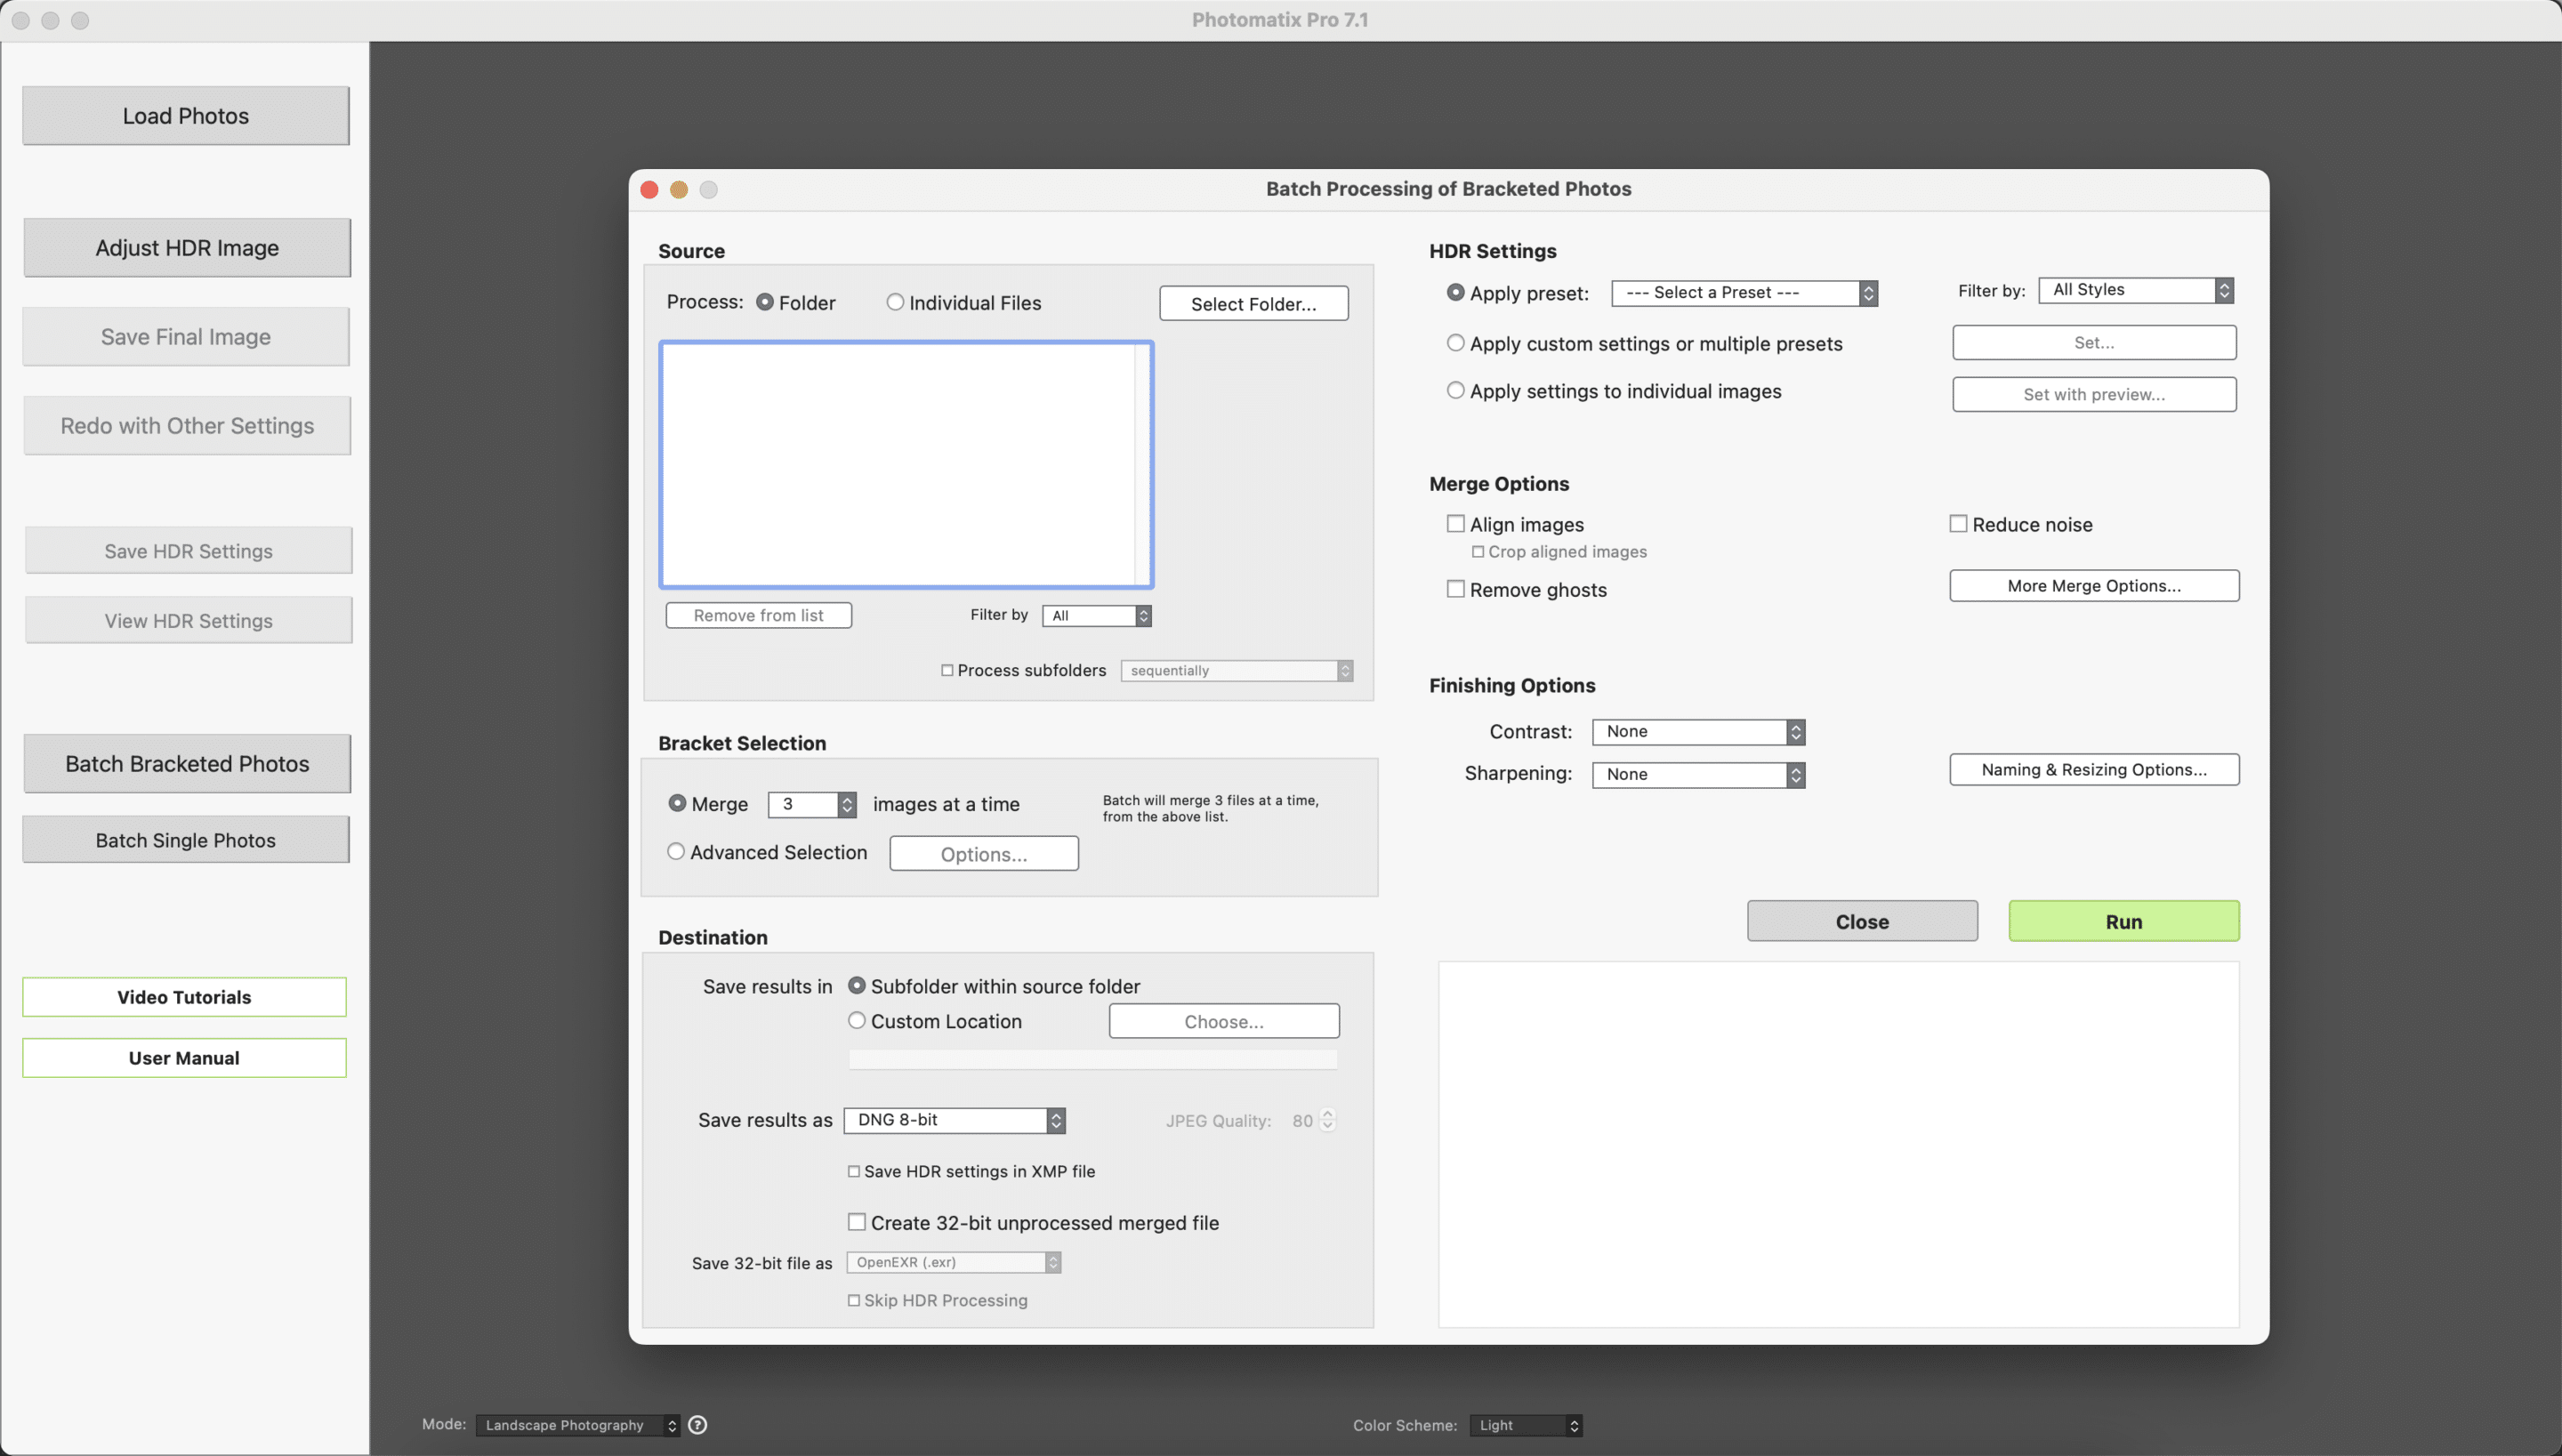
An added benefit is that Photomatix helps produce HDR time-lapse videos through the batch processing of bracketed photos.
The hard part is getting those time-lapsed, bracketed photos, which can take hours to photograph using an intervalometer.
After you photograph your time-lapsed, bracketed photos, you’ll have to batch-process the bracketed photos to produce a sequence of HDR images in JPEG format. It’s similar to editing one HDR image, but you’ll be merging a few hundred of them with this automatic setting and a preset.
However, Photmatix is not a video editor and you’ll still need a video application such as Premiere Pro or Final Cut Pro X to render and export images as a time-lapse video.
Photomatix Alternatives
Did you know Lightroom and Photoshop can merge bracketed photos? Both LR and PS have HDR merging, but their functionality is very limited. There isn’t much customization you can do.
If you don’t do much HDR photography or editing, then it’s probably better to save your money and just work with LR or PS for HDR.
On the other hand, Luminar Neo is a creative image editor with HDR made by Skylum.
You can now read my Luminar Neo review.
Verdict
Who should purchase Photomatix? Photomatix Pro is for photographers who shoot in poor light or want to add creative photography to their portfolio. As a result, you should have at least an intermediate level of image post-processing or looking to improve. Use the Photomatix coupon code aperlustphoto for a special 15% discount.
Photomatix Essentials ($39) might be a better fit with its simpler interface and features if you are looking only to touch the surface of HDR post-processing or make basic edits.
I mostly use Photomatix Pro for landscape photography during the twilight hours. My workflow consists of using Lightroom and Photomatix together, including making final adjustments in Photoshop. Most of all, the real power of a Photomatix HDR image is to make final detail adjustments with Photoshop layers and masking.
Frequently Asked Questions
Is Photomatix free?
Technically, yes. Photomatix comes with a free version with all its features included. However the final image upon export includes watermark. This allows photographers to review the software for an unlimited amount of time. If you want the watermark removed, you can purchase the software at a generous $99 with no subscription.
How much does Photomatix cost?
Photomatix Pro costs a one-time fee of $99 and includes a free major upgrade. This means if you buy version 7, then all updates to version 7 will be free, and a future upgrade to version 8 will also be free. Use coupon code aperlustphoto for a 15% discount.
What is the best HDR plugin for Photoshop?
Photomatix Pro 7 is the best HDR plugin for Photoshop because it integrates well with Lightroom. This allows importing and exporting the bracketed photos seamlessly between the software. In addition, Photomatix offers two types of HDR merging, fusion and tone-mapping, allowing for better HDR color grading. Plus, the software has no subscription fees, and the next major version upgrade is free.

Hola Parceros,
I’m the founder of Aperlust. I enjoy web development and SEO and am into snowboarding and linguistics. In my spare time, you can find me destroying my opponents in chess across the globe.
Photomatix Pro 7
HDR software made by HDRsoft. This Photomatix review covers version Pro 7 and goes over the pros and cons with examples photos.
Operating System: Mac, Windows
Application Category: MultimediaApplication
4.5