Last updated on December 8th, 2023
Capture One now has a Photomatix plugin. This allows photographers to HDR merge bracketed photos with a faster workflow which wasn’t possible before.
Photographing HDR scenes and post-processing them will be easier now in Capture One.
Capture One HDR Tool
I’ll explain more about how the Photomatix plugin works but first let’s take a look at the HDR tool found in the exposure tab of Capture One.
The HDR or high-dynamic-range tool is to help photographers improve the dynamic range of images that are too bright or too dark.
By dynamic, I mean where there is a lot of bright and dark areas in front of the camera lens. Sometimes clipping is involved in the photographed image file.
The tool is intended for single-exposure images when capturing a set of bracketed photos wasn’t possible.
Bracketed photos are aligned images taken at different f-stops or exposures: usually -1, 0 +1, or -2, -1, 0, +1, +2. I usually take a set of 3 bracketed photos.
It’s not always easy to photograph three or more aligned bracketed photos in dynamic scenes.
Scenarios where it’s difficult to capture bracketed photos:
- You forget your tripod at home.
- It’s difficult to carry your tripod with you on long journeys.
- Some countries do not allow tripods to pass through airport carry-on security screening.
- The wind is strong and shaking your tripod.
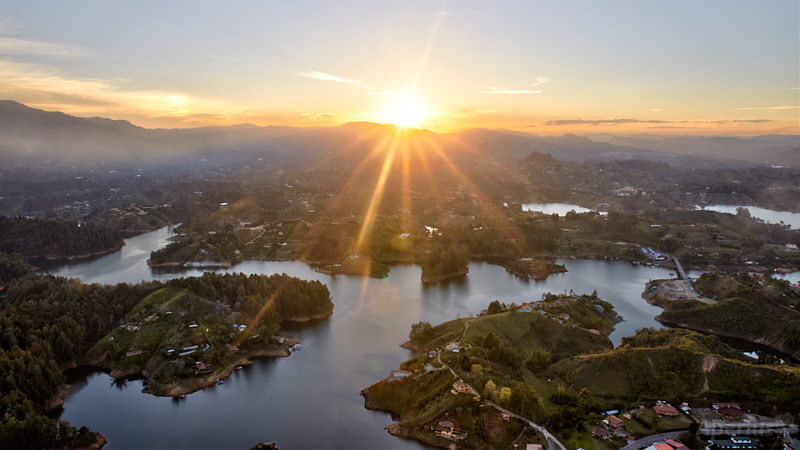
The below image was photographed in El Penon, Colombia.
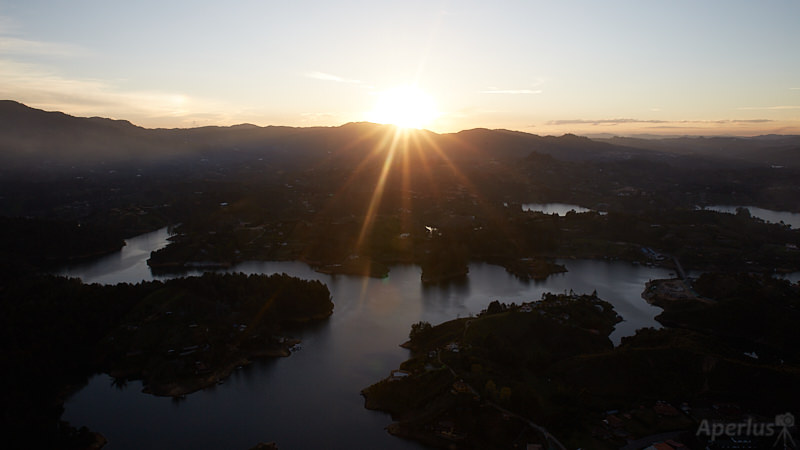
The main problem with this image is that the shadows are too dark. The highlights around the sun need some work done.
I used the Capture One HDR tool and first clicked on its automatic setting, which looks like a wand.
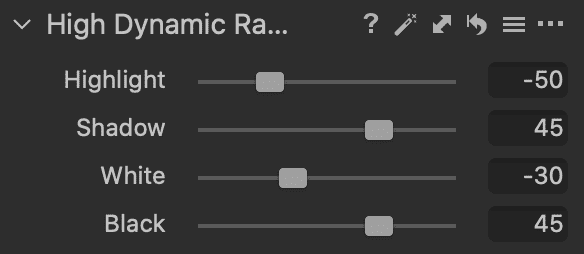
The tool analyzed the image’s dynamic range and adjusted it. In this case, it reduced the highlight to -1 and increased the shadow to 45, which wasn’t good enough.
The shadows still looked too dark, and I thought more could be done to make the sun look better.
I decided to decrease the highlight and white to -50 and -30 respectively. Then I increased the shadow and black to 45 each.
The sky and the mountains look much more appealing. The foreground is more visible.

Of course, I could make more adjustments to the image and make it pop by using other tools. But I’m only demonstrating the HDR tool here.
I should mention that farmers in the area were burning crops. Consequently, there is quite a bit of haze in the atmosphere resulting in the image appearing soft.
At the time of writing this, Capture One Pro 20 doesn’t have a dehaze tool. The Capture One community is requesting Phase One to develop a dehaze tool.
As great as the Capture One HDR tool is, it’s not true HDR photography or post-processing.
And the HDR tool name is a bit confusing for photographers new to HDR. But I understand why Capture One named it HDR: to correct the dynamic range.
Capture One HDR Merge with Photomatix Plugin
As mentioned earlier, HDR photography requires bracketed images. We take these bracketed photos and merge them through fusion exposure or tone-mapping to create a single HDR image.
HDRSoft’s Photomatix plugin allows users to export 3 or more bracketed photos from Capture One and merge them in Photomatix.
I took the above single exposure image along with its -2 and +2 f-stop exposures and merged them in Photomatix.
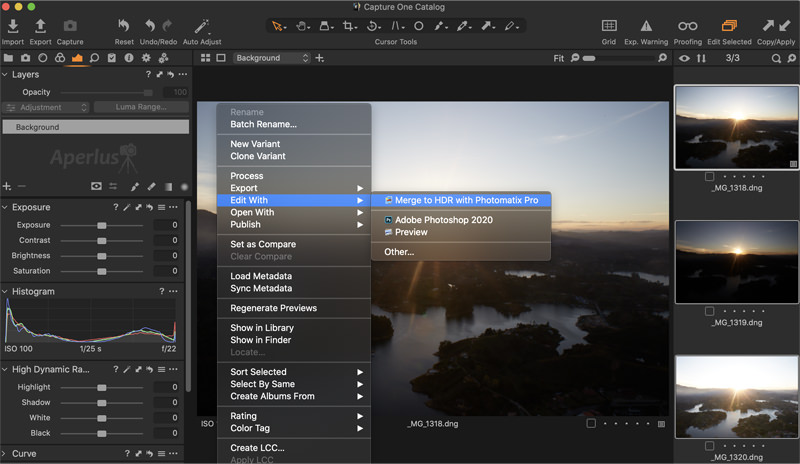
In order to merge the images in Photomatix, you’ll need to shift-click on the images, and then right-click on the mouse to bring up a floating menu. Here you can Merge to HDR with Photomatix Pro.
These images were taken on a tripod.
In Photomatix, I made a few simple adjustments.
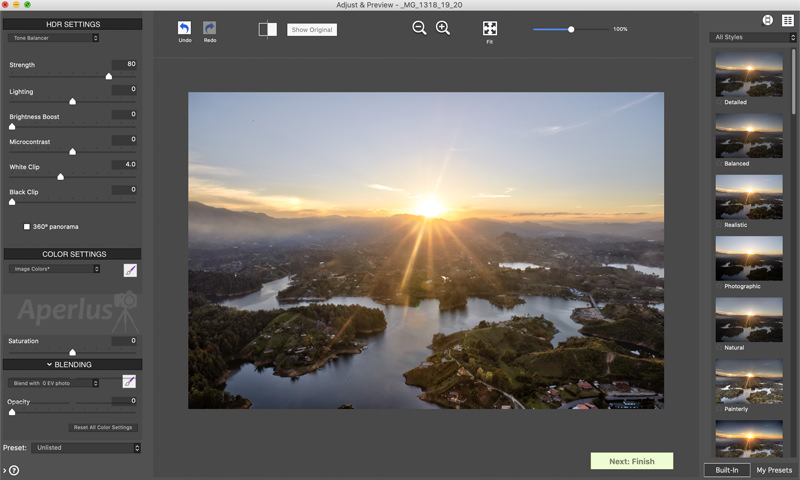
Keep in mind Photomatix has quite a bit of advanced sliders which I usually forget.
I ended up playing with the sliders or hovering over them to read their descriptions. I spent less than 2 minutes playing around with the presets and sliders in Photomatix.
I came away with the below image, which looks more aesthetic and some of the haze has been removed.
Usually, at this point, I would make further edits with Capture One, but I only want to highlight Photomatix’s HDR merging technology.
Conclusion
Capture One’s HDR Tool is still a great feature.
I say this because not every poor-light image needs to go through the HDR merging process.
If there is enough exposure or detail in the highlights or shadows of a single-exposure image, then there isn’t really a need to use HDR software.
Sometimes the HDR merged photo comes off worse than the edited single-exposure image. It really comes down to trial and error.
When you’re photographing a dynamic landscape or whatever, try to keep capturing the image without any clipping. You’ll need to pay attention to the histogram. And if possible, keep it centered.
Photomatix and HDR software in general should be used when you can’t recover the highlights or shadows without losing quality in the image. And of course, you’ll need bracketed image files which will considerably take up extra space in your hard drive or cloud storage.
Also, it’s easy to overcook an image in HDR software. Kind of like oversaturating an image. So, don’t go overboard with HDR photography.

Hola Parceros,
I’m the founder of Aperlust. I enjoy web development and SEO and am into snowboarding and linguistics. In my spare time, you can find me destroying my opponents in chess across the globe.