Suppose you want to make specific edits in a certain region of an image, also known as local adjustments. In that case, you need to learn how to mask in Lightroom Classic. And that’s exactly what we’ll cover in this guide. Plus, there’s a Lightroom Classic masking video tutorial to make things easier.
Related:
- How to Buy Lightroom in 2024
- Best Laptops for Lightroom and Photoshop
- Luminar Neo Review — AI-Image Editing
What is a Mask in Lightroom Classic?
A mask in Lightroom applies edits to a specific region you select on an image. You have to manually create the mask or use some of Lightroom’s AI masking tools.
The mask tool is located between the histogram and the basic panel. You can also press the Lightroom Classic keyboard shortcut shift + W to activate the masking options.
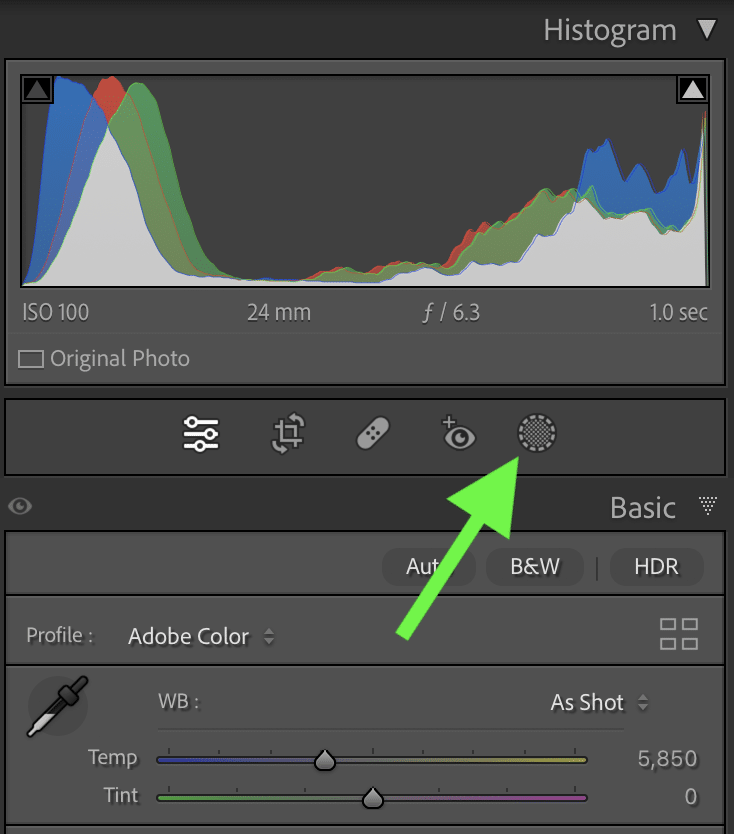
You can view the mask with the red overlay on the image or the black-and-white overlay (there are also other overlay options).
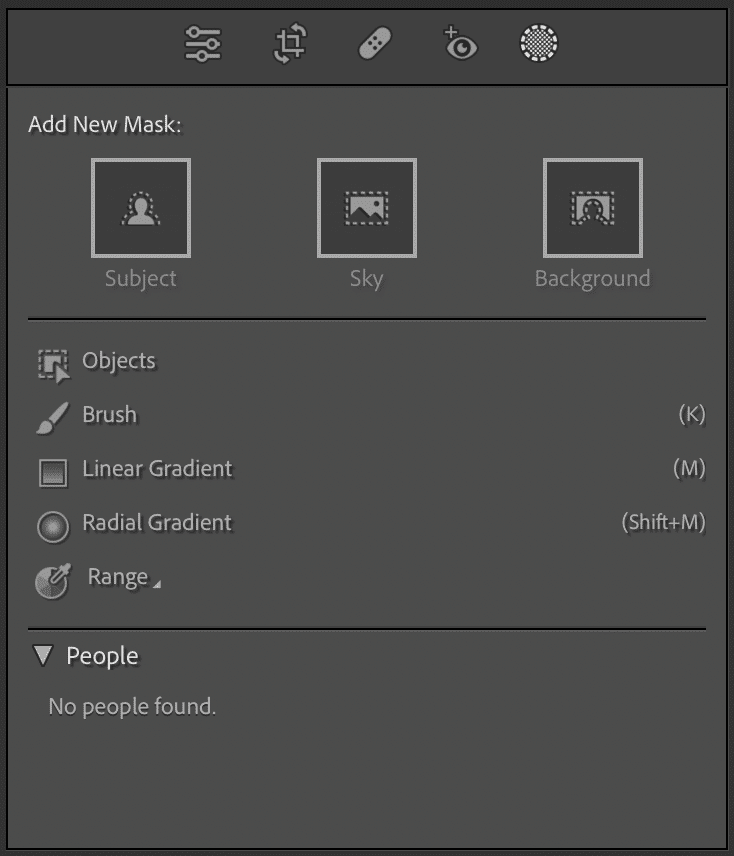
There are different ways to create a mask in Lightroom.
- Brush
- Linear and radial gradients
- Color and luminance ranges
- Objects AI
- Subject, Sky, and Background AI
- People AI
Different Ways You Can Apply a Lightroom Classic Mask
Masking in Lightroom Classic can seem overwhelming due to the fact that there are several options. Masking used to be simpler in Lightroom Classic because there was no masking with artificial intelligence or intersecting masks.
However, with the addition of new masking tools, Lightroom Classic is closing in on Photoshop’s editing abilities.
I’m going to break down how to use the different mask options. Once you get to try it out yourself, you’ll realize how easy it is and the precise photo edits you can do.
Masking Brush
The masking brush is probably the most common mask you’ll use.
You can create two different types of mask brushes, A or B, and also an erase brush.
You can control the size, feather, flow, and density of the brush.
Use the keyboard shortcuts [ and ] to control the size of the brush.
The feather controls the transition or smoothness of the brush. A feather of 100 gives the mask the smoothest transition. A feather of 0 will give the mask hard edges.
The flow controls how hard each stroke is and works with the brush density. The density controls the maximum strength of the mask. Think of density like opacity. If you have a 25 flow and a 100 density, you will need to paint more to reach 100 density than if you had a 50 flow.
The auto mask option helps masking along edges. You’ll need to paint your mask using the plus sign along the edges without the plus sign crossing the edge for the best results.
In the below example, I painted a mask to create a custom vignette without darkening the bottom corners. I decreased the exposure, highlights, and whites sliders to apply a darken vignette. You can click on the images to expand them.


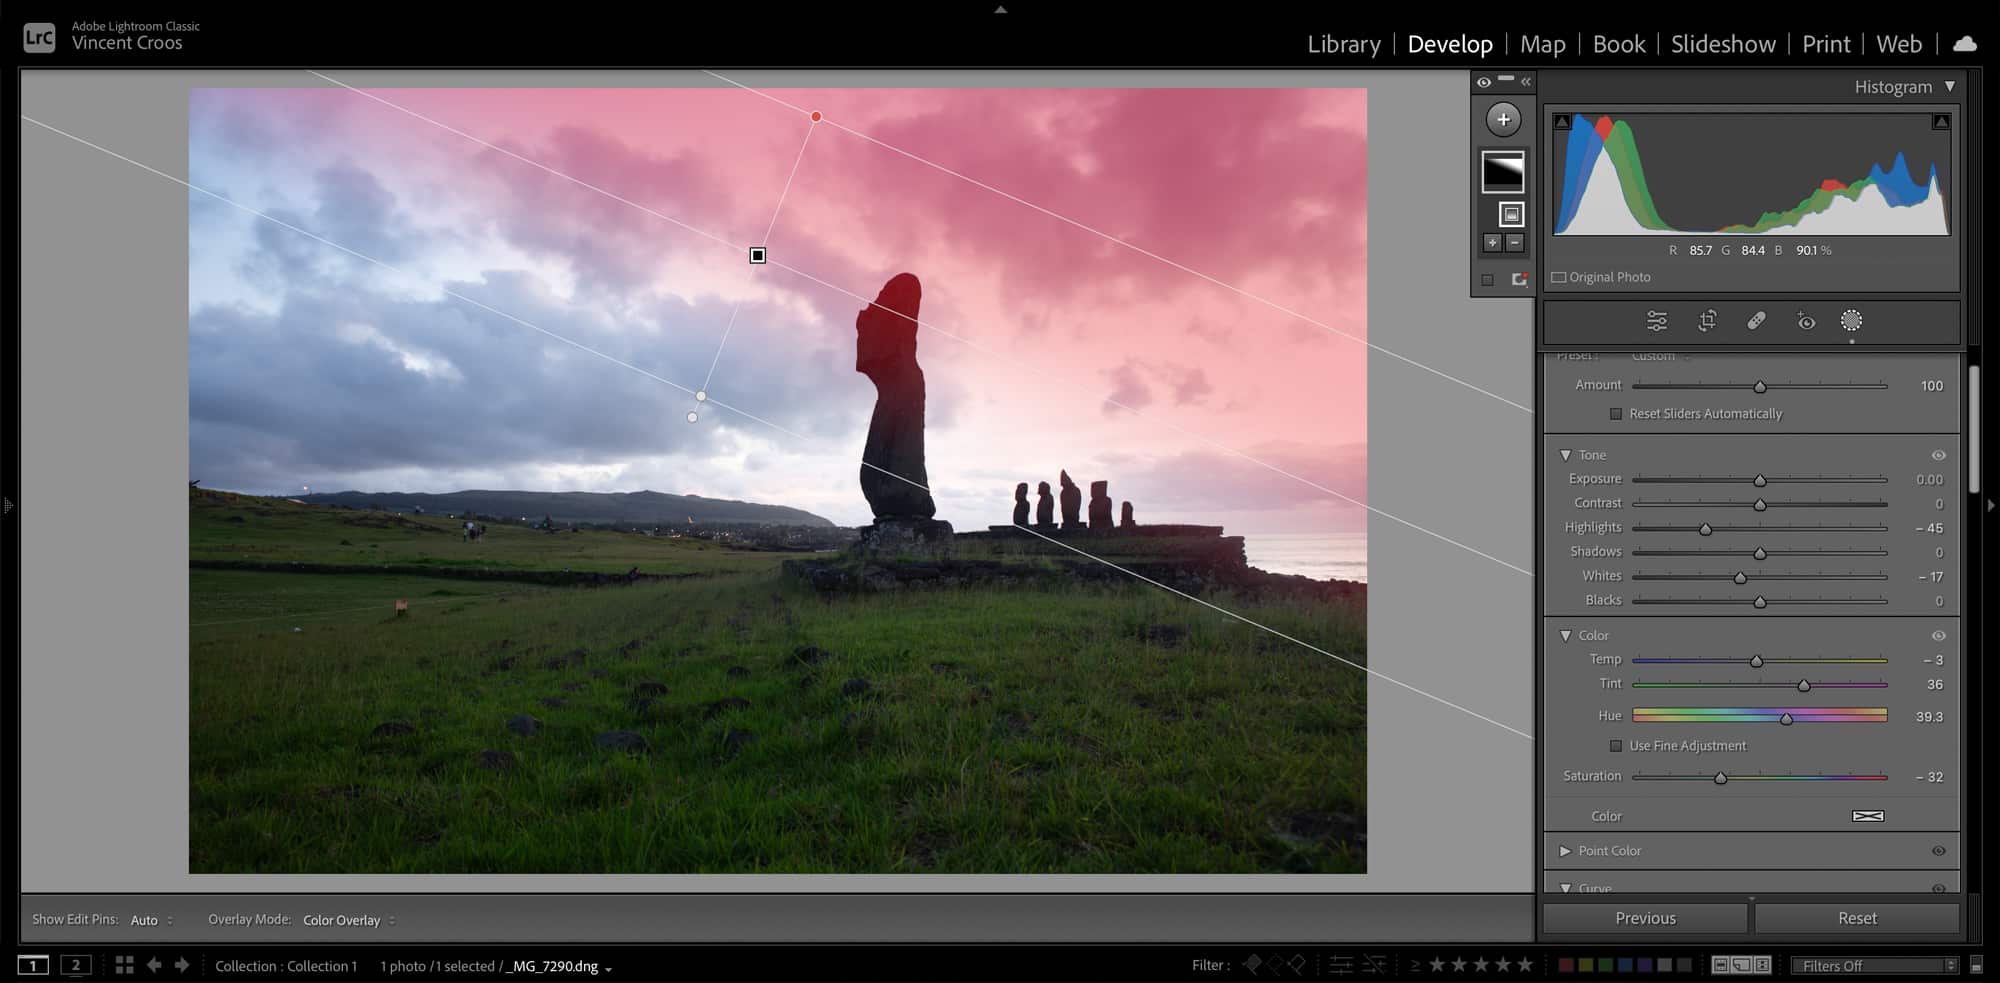
Linear and Radial Gradient Masks
The linear and radial gradient tools are fun to use since you don’t have to paint with the brush. Adjusting your gradients is also easy by adjusting the pins.
You can move around the gradients by selecting the solid black pin. You can also change the feather or gradient size by selecting and adjusting the solid red or white pins.
As the name suggests, the linear gradient makes a straight transition from revealing the mask to hiding the mask. The transition is similar to the masking brush feather. The wider the linear gradient is, the smoother the transition is. You can rotate the linear gradient by dragging around the outer white solid pin.
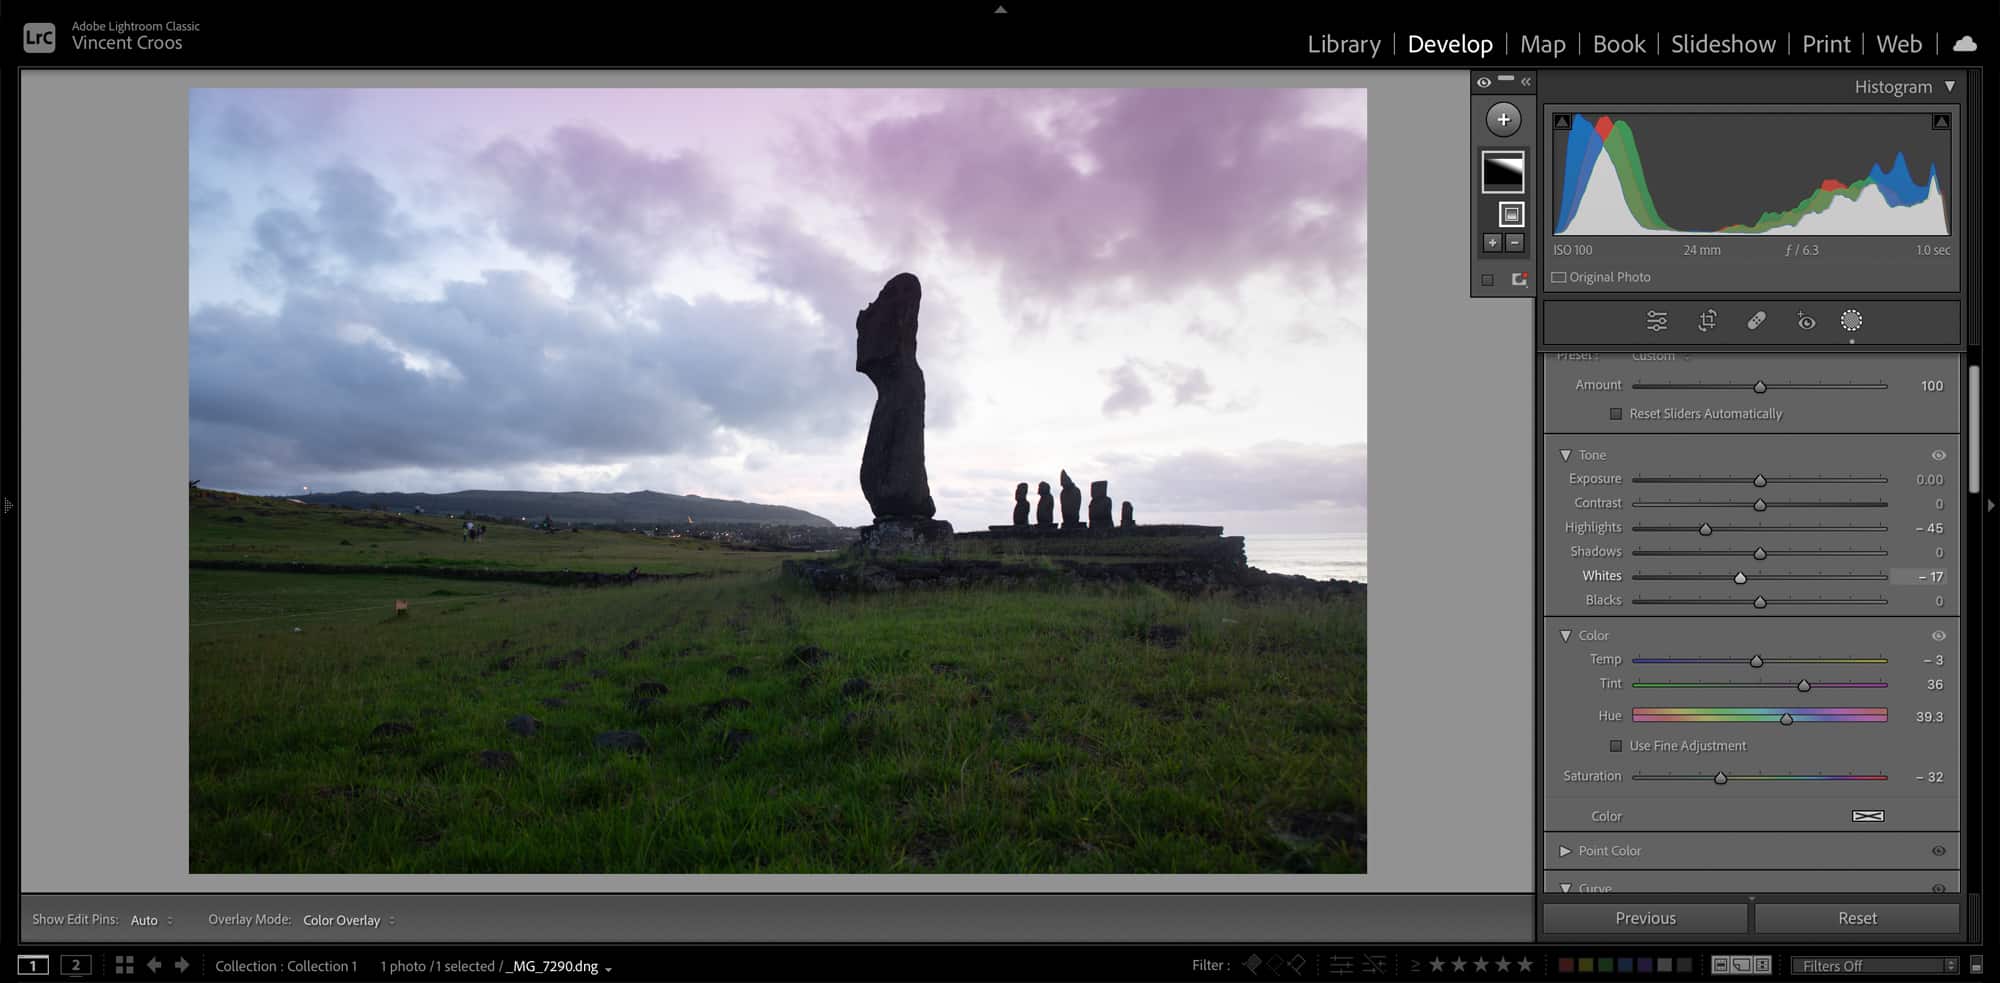
In the image below, I used the linear gradient to do some color grading to the sky in the top-right corner. It’s not my best work, but hopefully, you get the idea of how the linear gradient works.
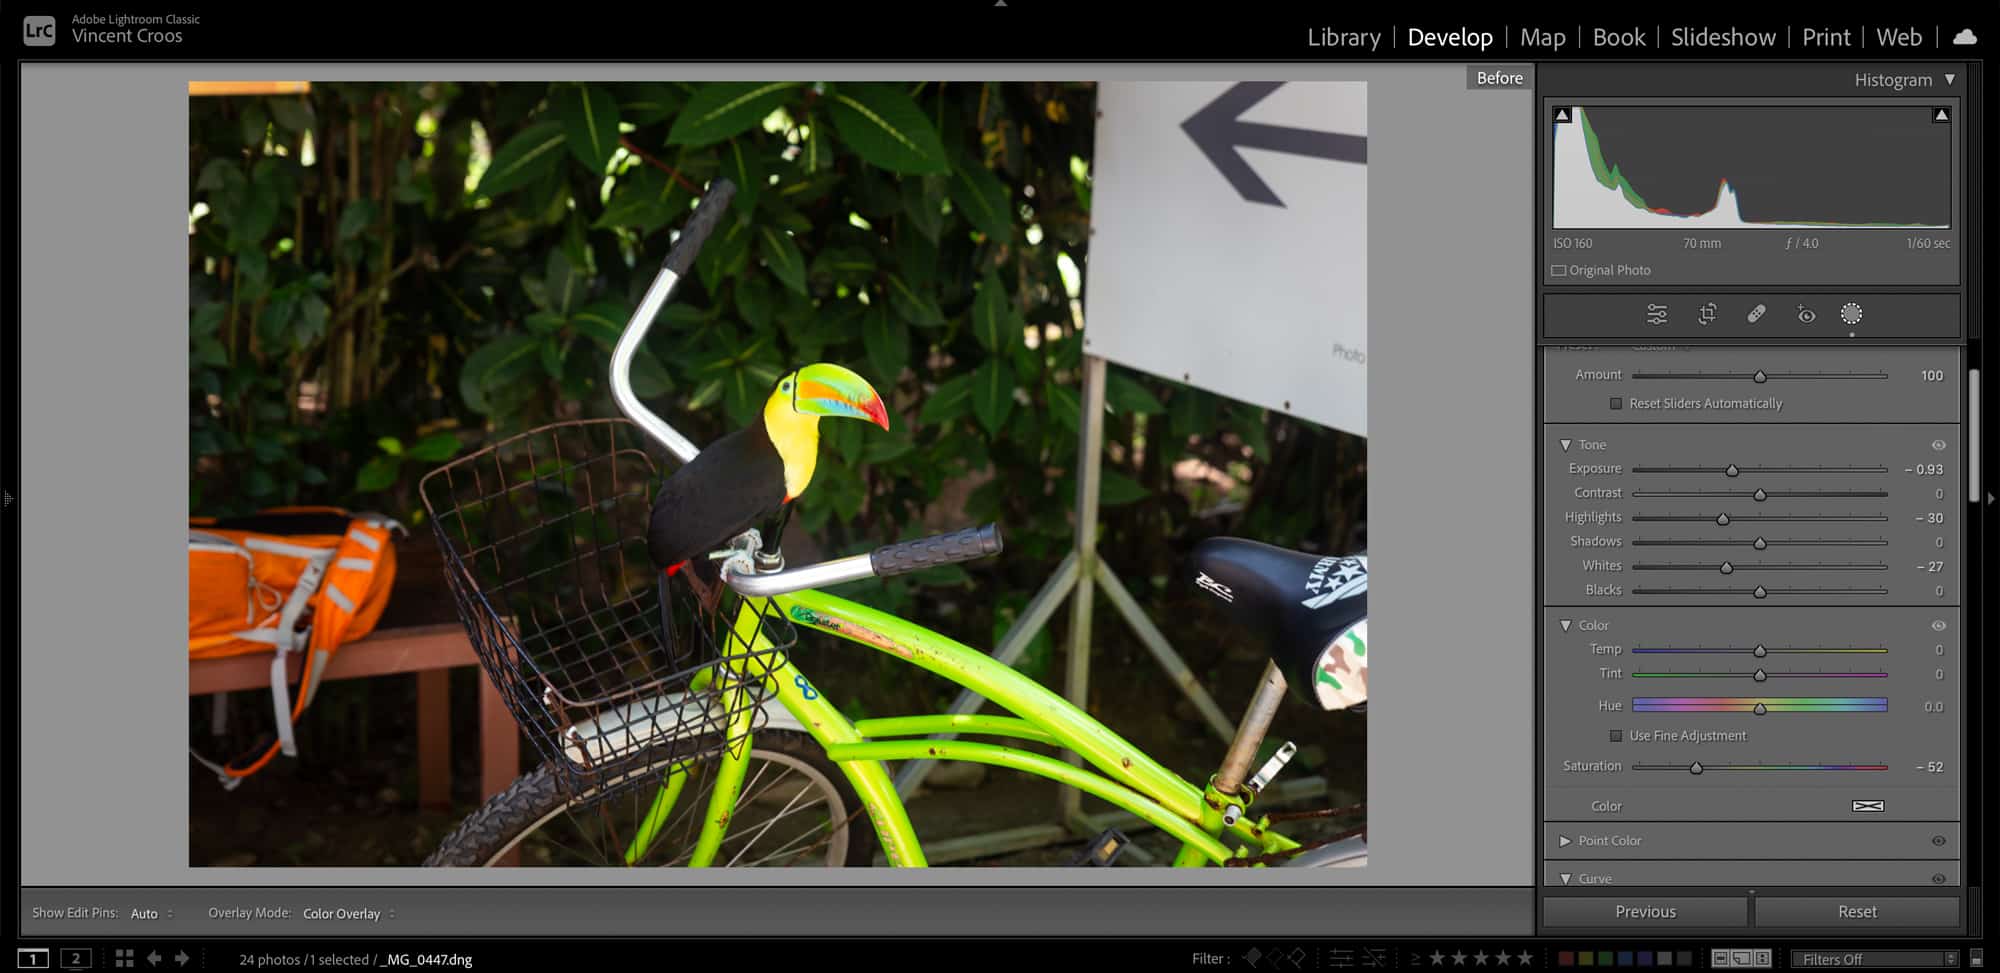
I used an inverted radial gradient to focus more on the toucan in the image below. You may be wondering why I just didn’t you the vignette tool in the Effects Panel. If you look closely, I also decreased the saturation of the green bicycle, allowing more emphasis on the toucan.
In most situations in Lightroom Classic, the subject or the area where you want to apply the radial gradient will not be in the center of the photo.

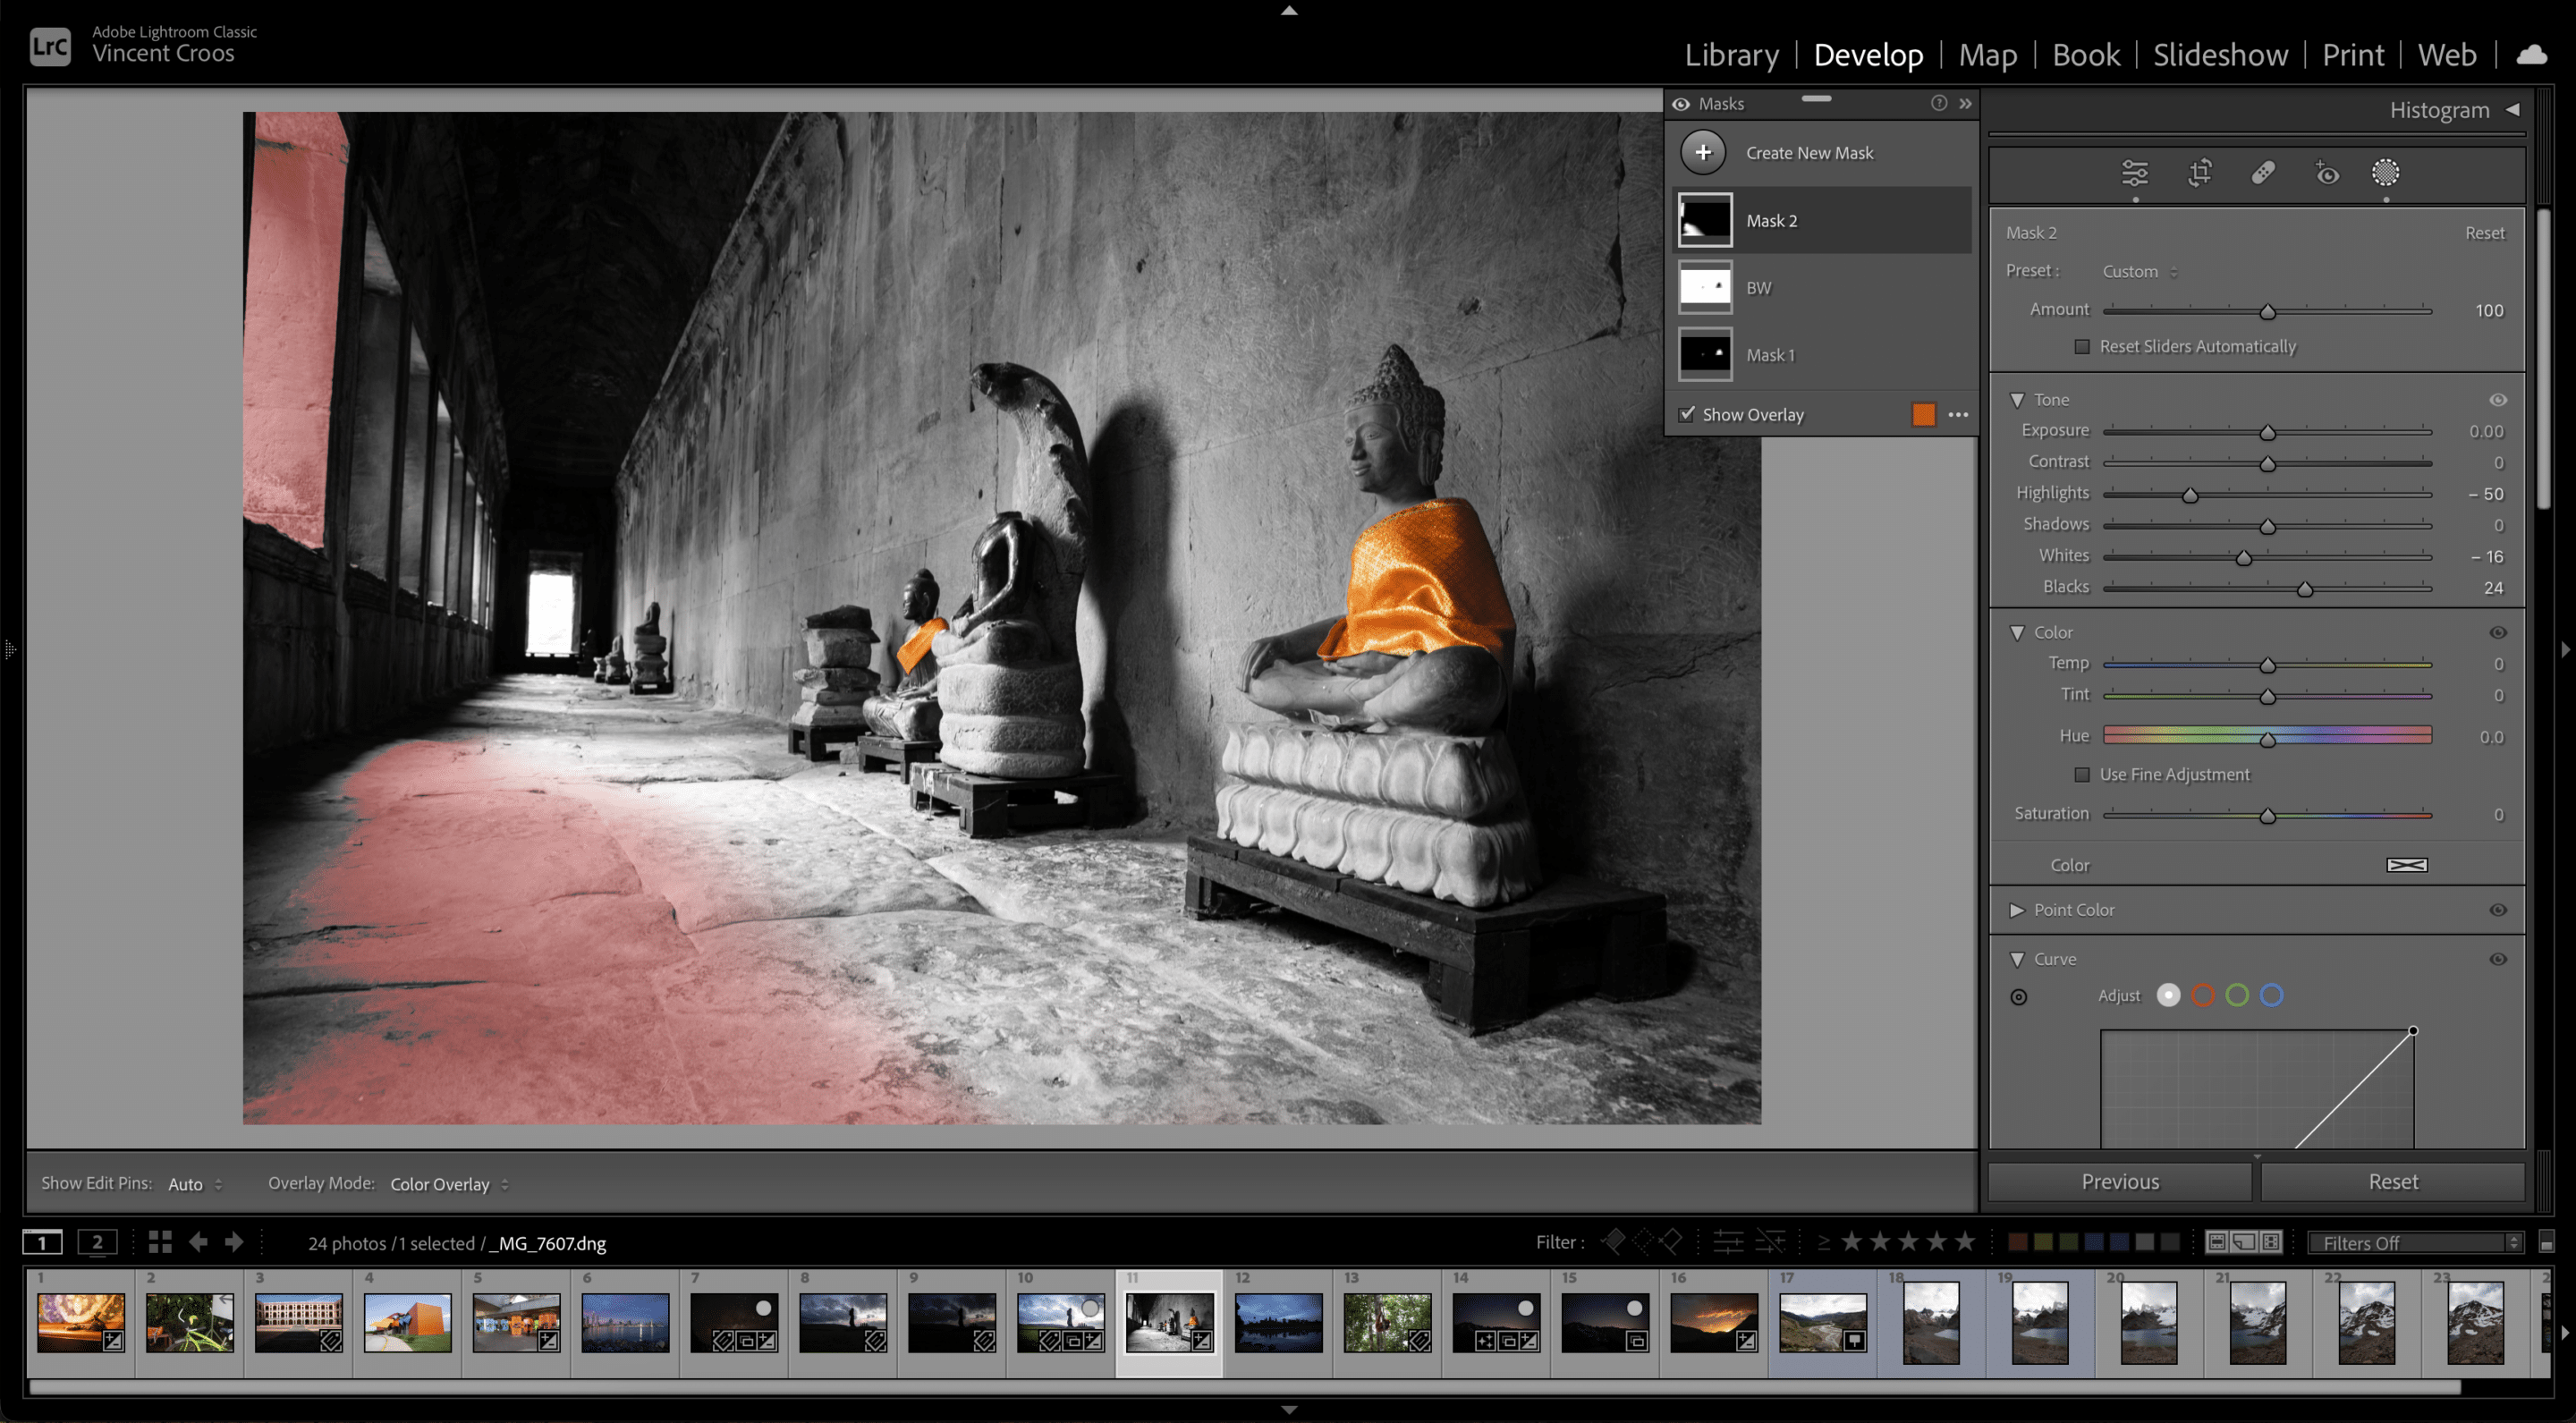
Color and Luminance Range Masks
The color and luminance range masks are exciting additions to masking in Lightroom Classic. Previously, these tools were not available in LrC, and you can only accomplish such masking tasks in Photoshop.
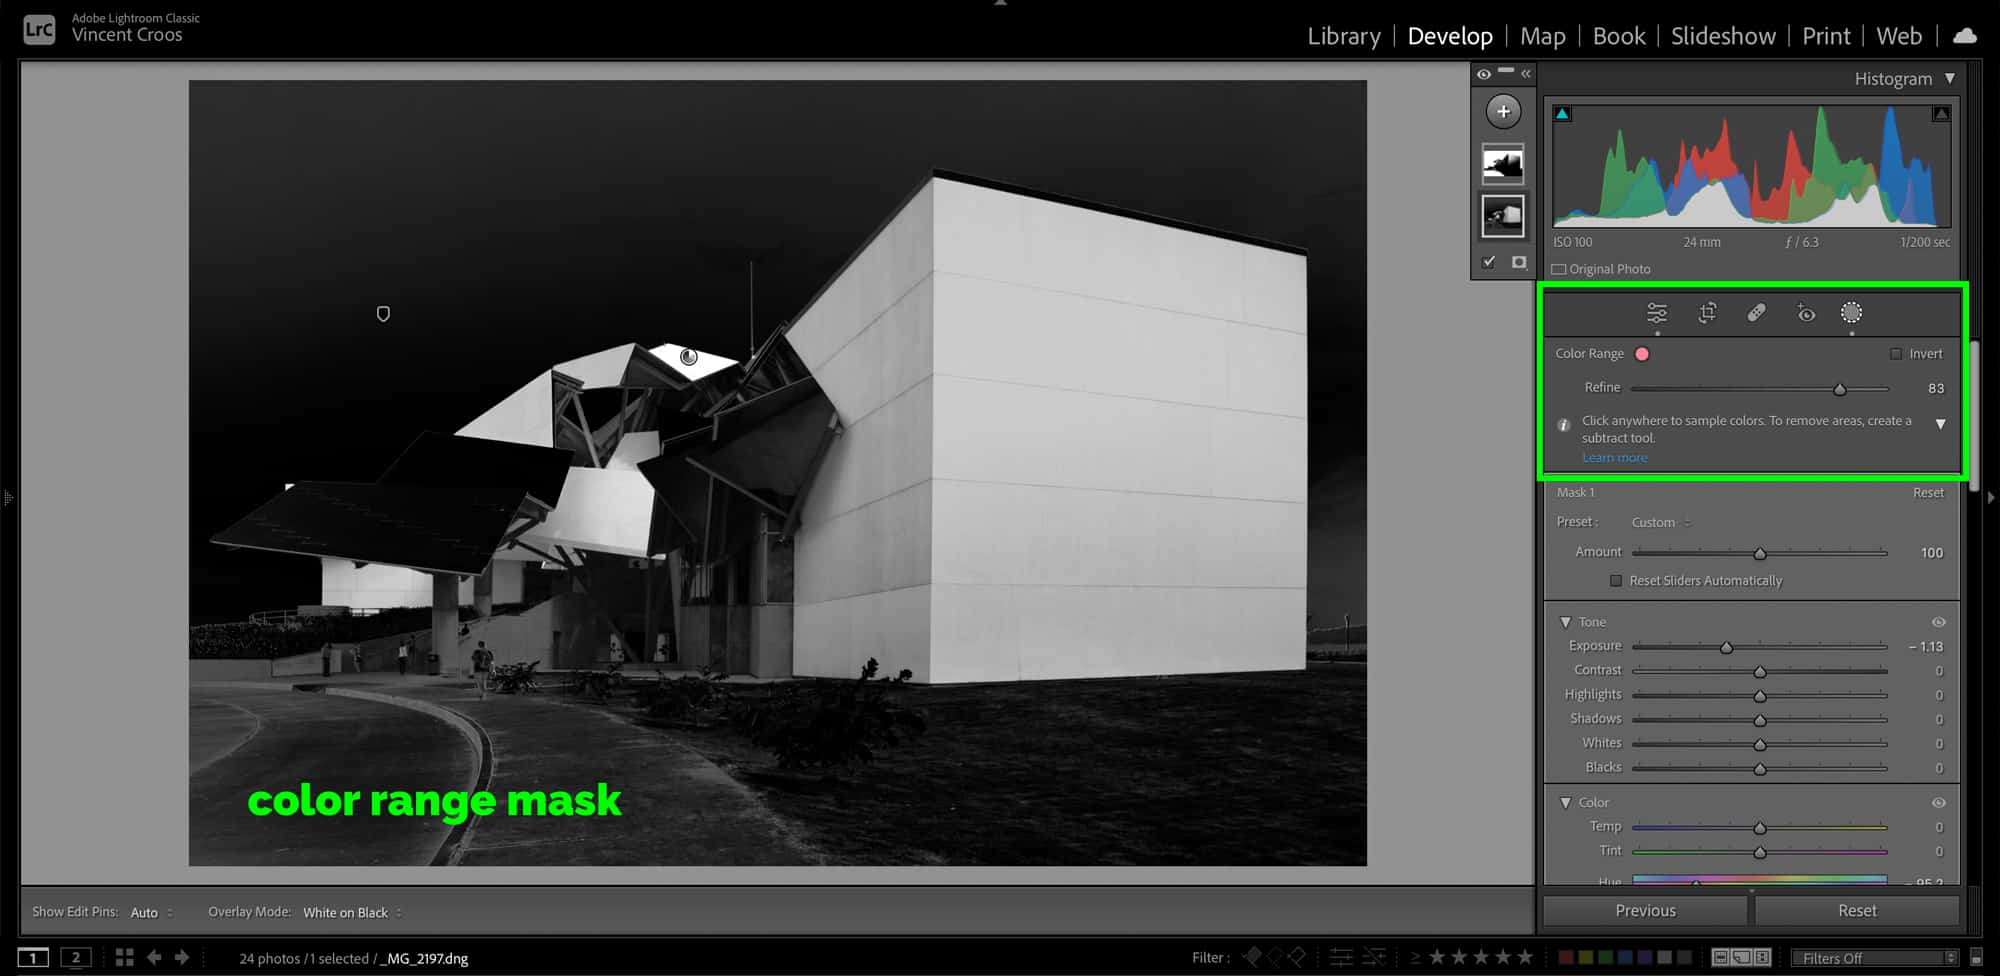
The color range uses the eyedropper tool to select a color and mask it. You can refine the color range, which broadens the color hue and distance from the sampled color, making the color range’s mask wider.
On the other hand, the luminance range mask focuses on the highlights and shadows. This tool is great for masking blown-out areas of a sky. You can also refine the luminance range using the sliders.
In the photos below, I selected the orange wall on the side of the building and changed the hue to make all the reddish-orange areas appear purple. I also saturated the highlights with the luminance range mask.
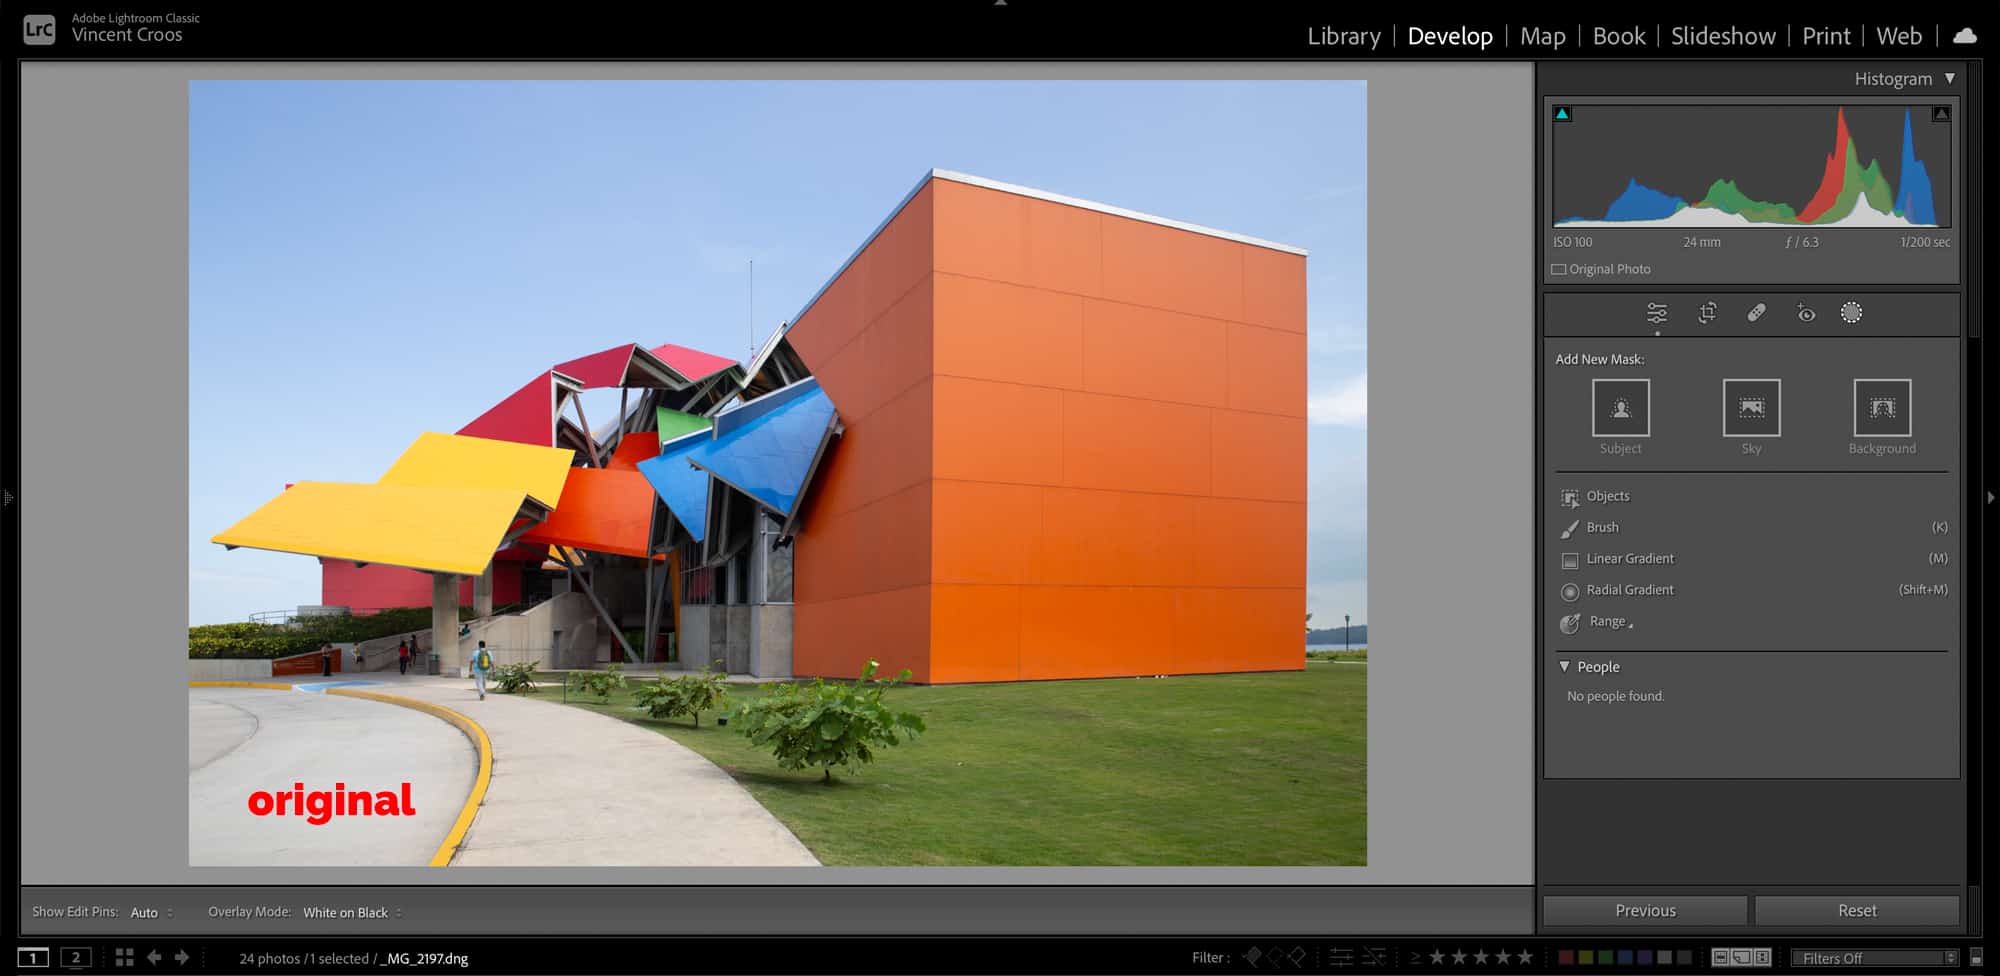
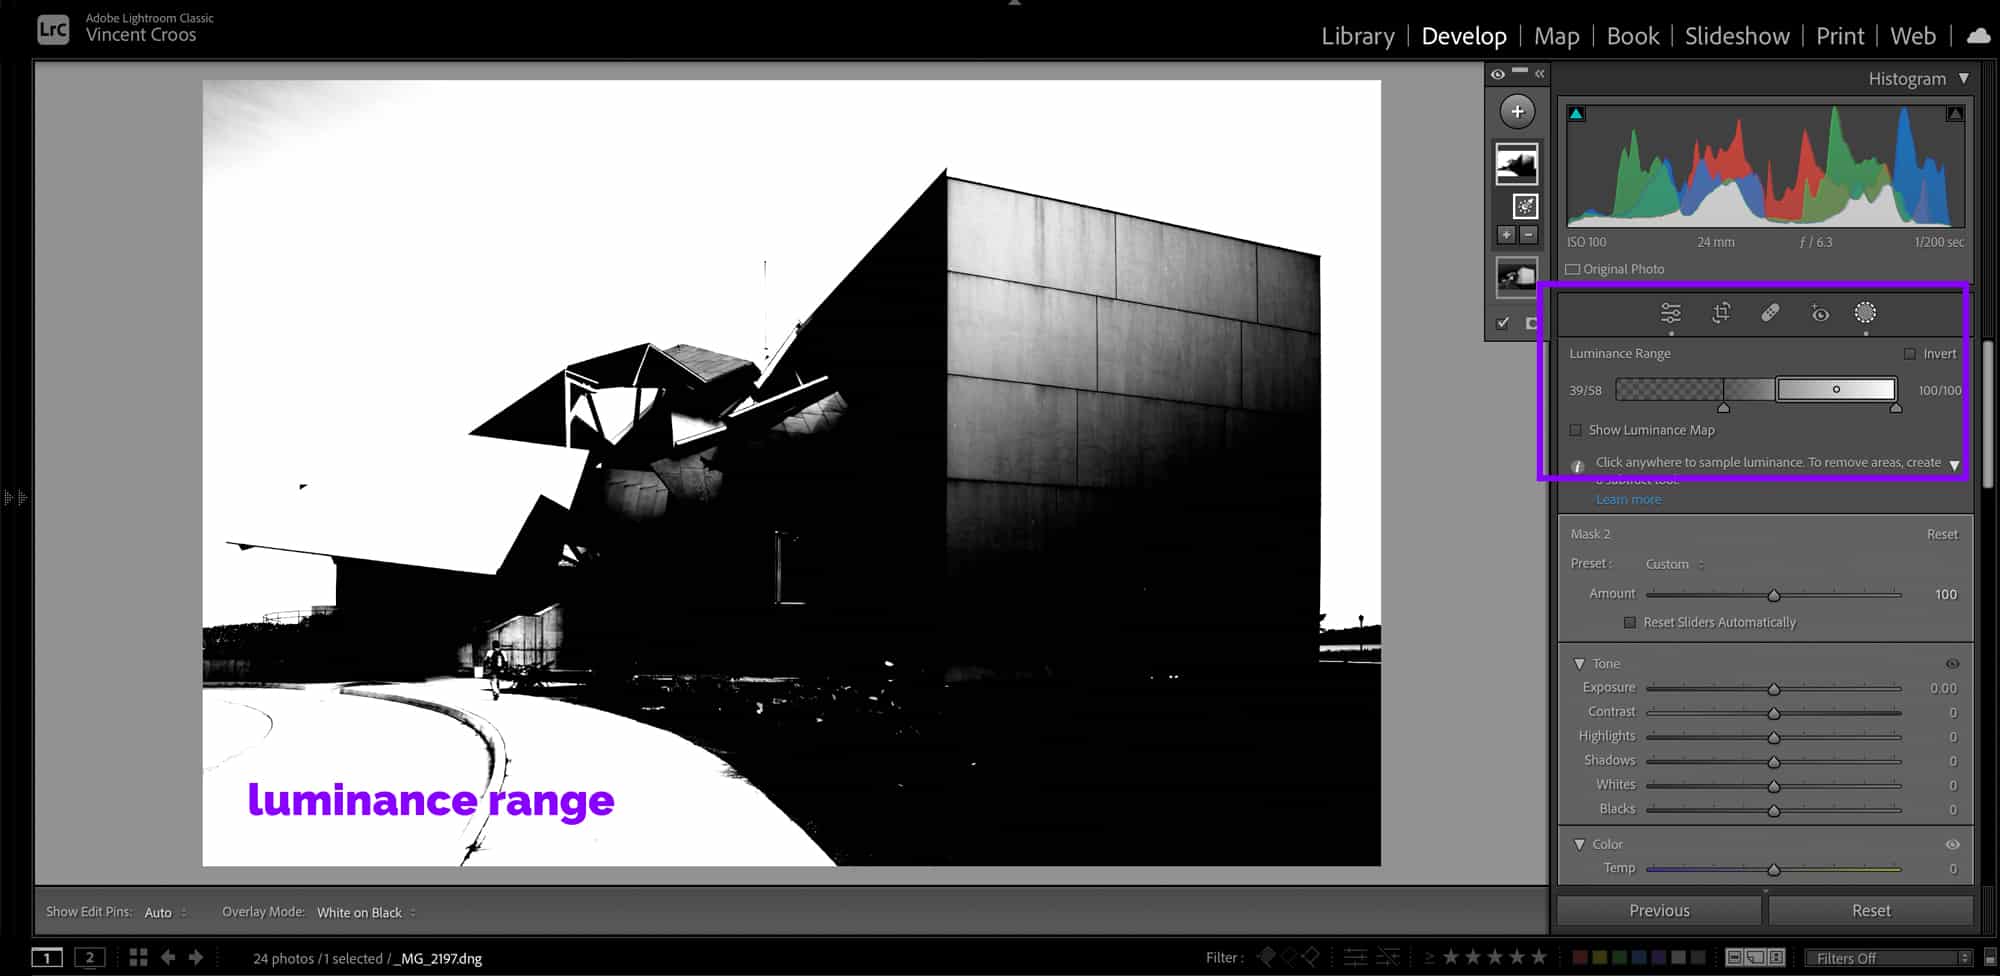
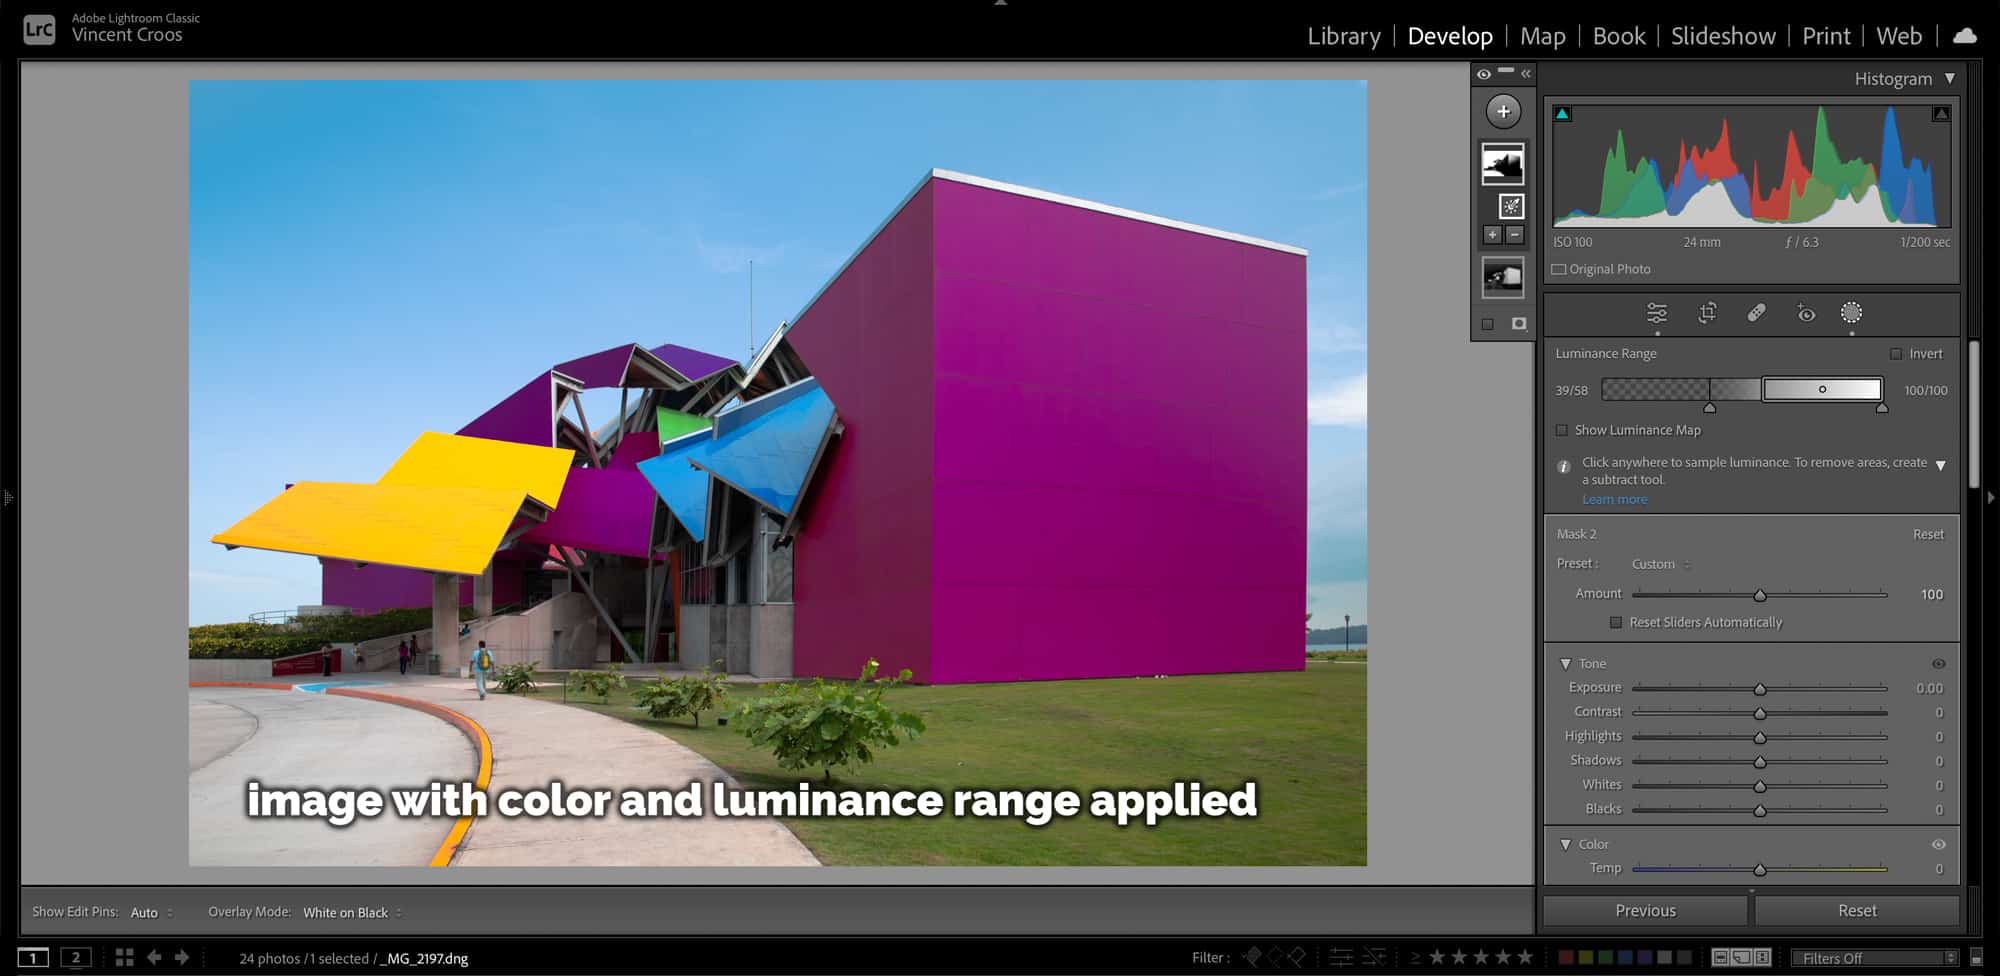
One thing you have to be careful with the color and luminance range is masking or selecting parts of an image that you don’t want, which is apparent in the examples above. Luckily, in Lightroom Classic, you can subtract from masks.
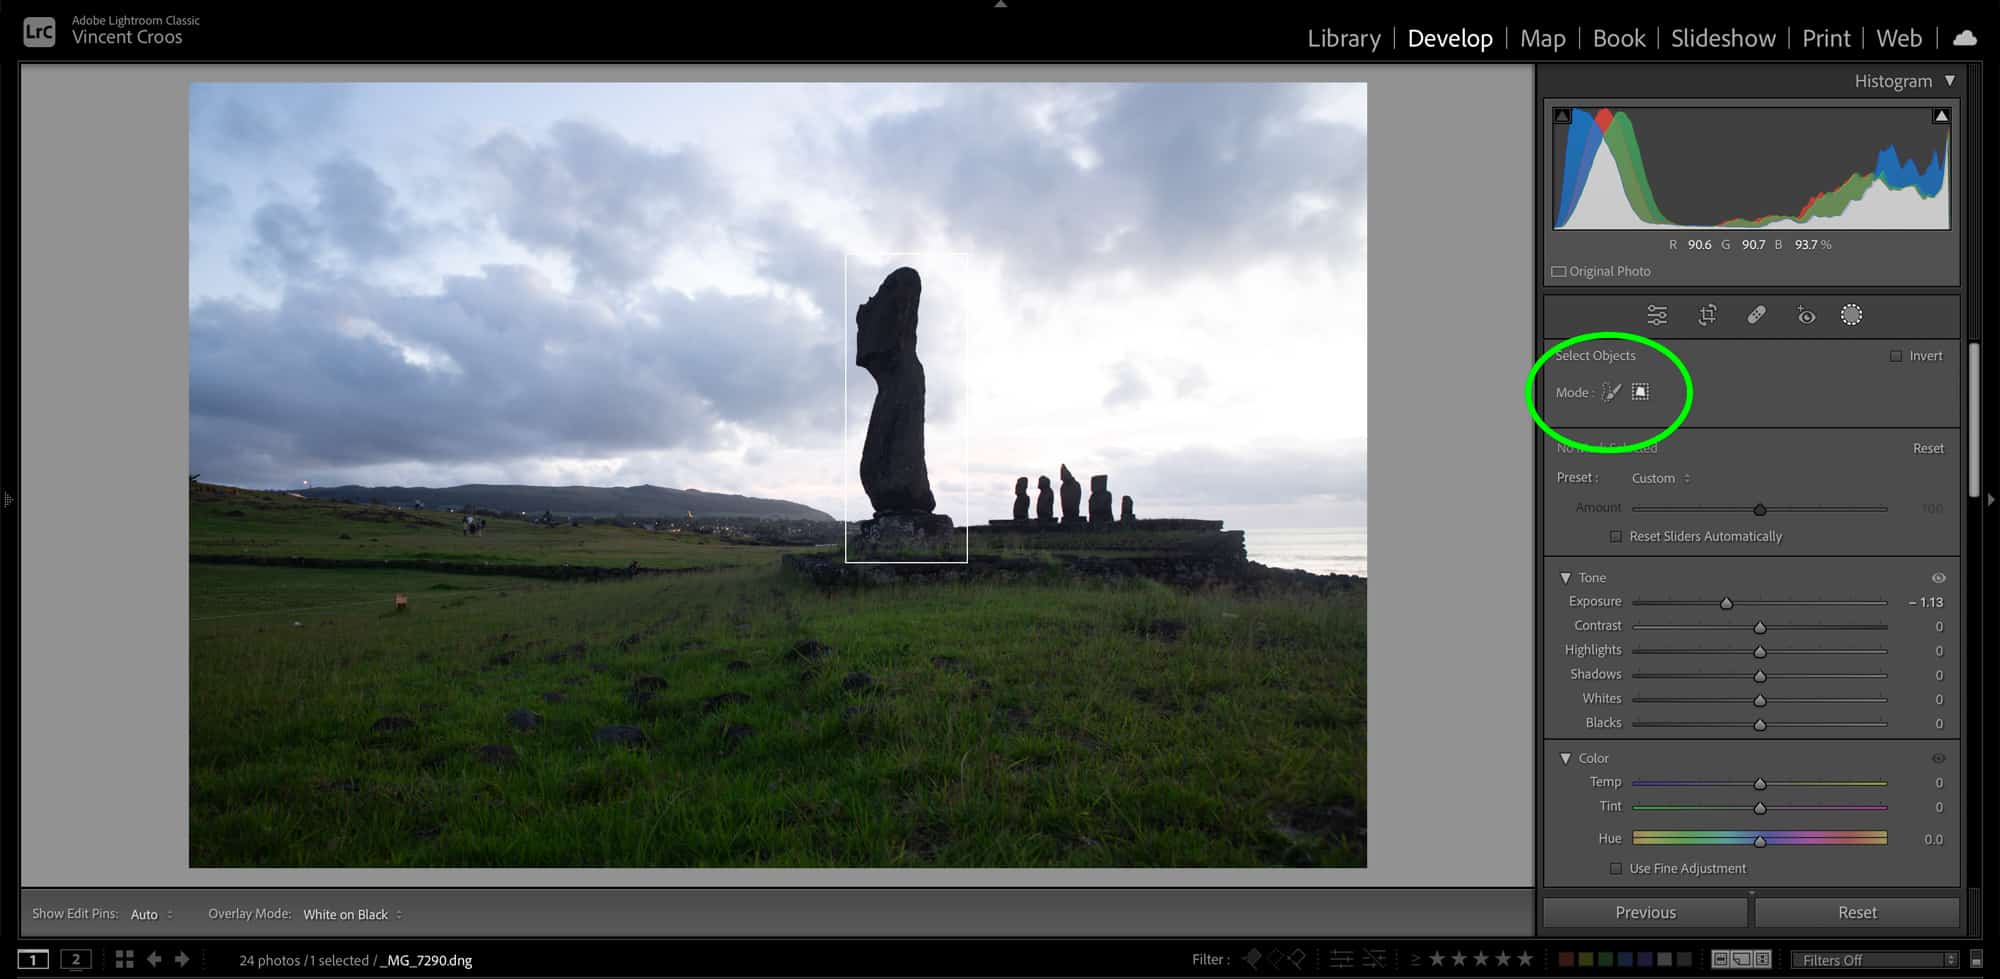
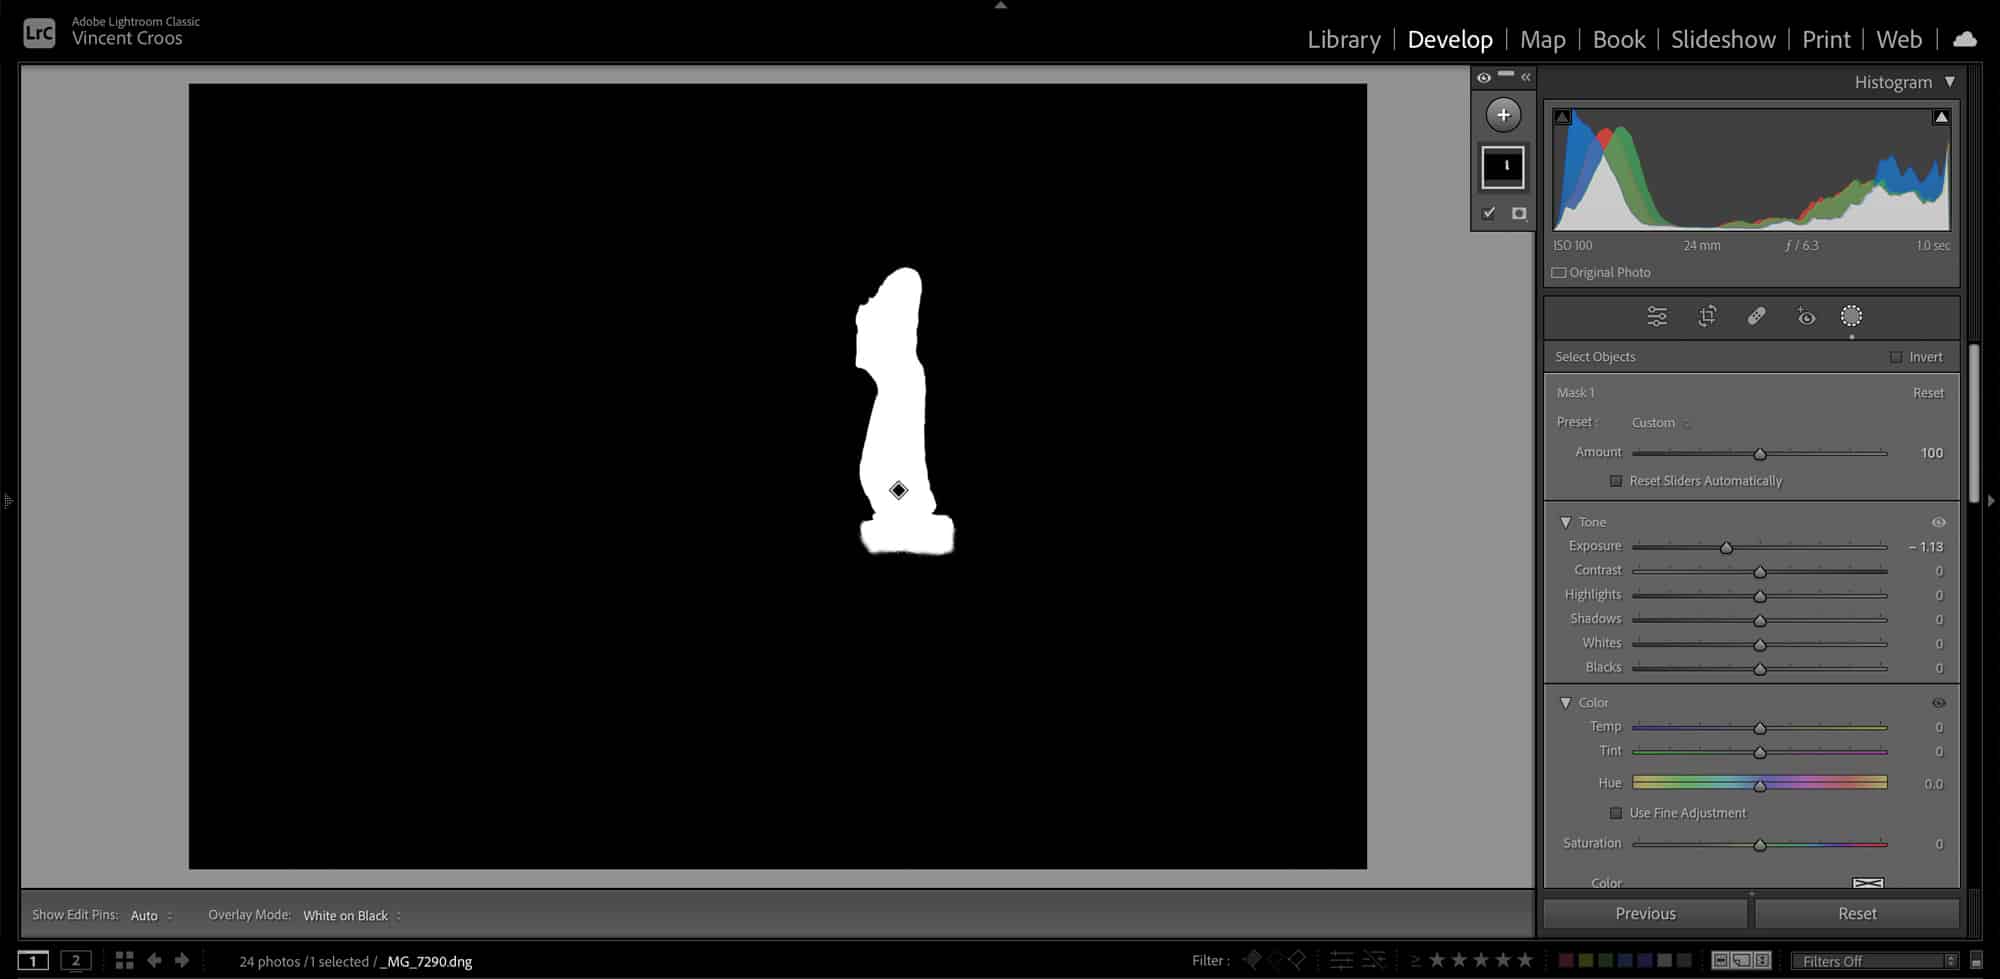
Objects AI Mask
The objects mask uses AI to mask a selected area. Lightroom Classic will identify the object you want to be masked in the selected area and automatically apply the mask. This method of masking an object is much faster than using the masking brush auto-mask tool with edge detection. To select the object area, you can paint over the area with the dedicated object brush or choose to select a region by dragging a rectangle over the object.
Subject, Sky, and Background Masks
These masks are one-click AI-generated. You pretty much just click the mask — and voila — the mask has already been applied. They are a faster version of the objects mask.
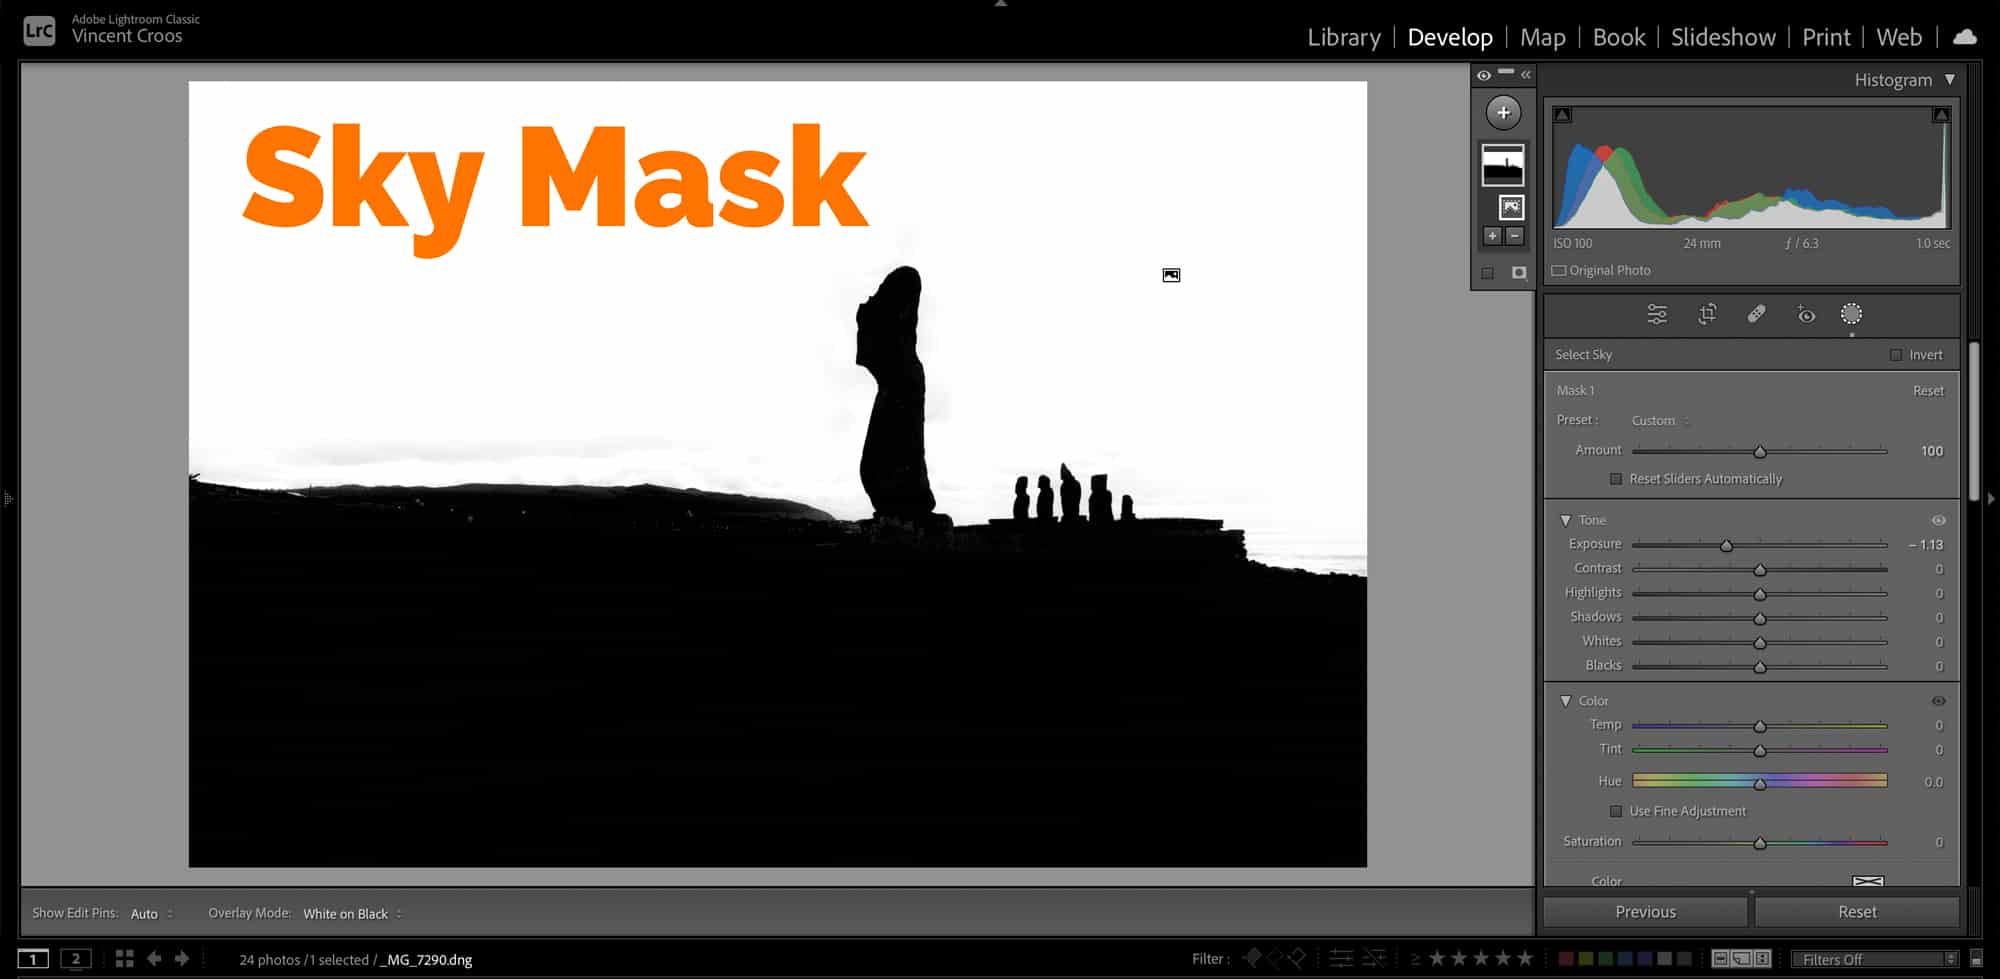
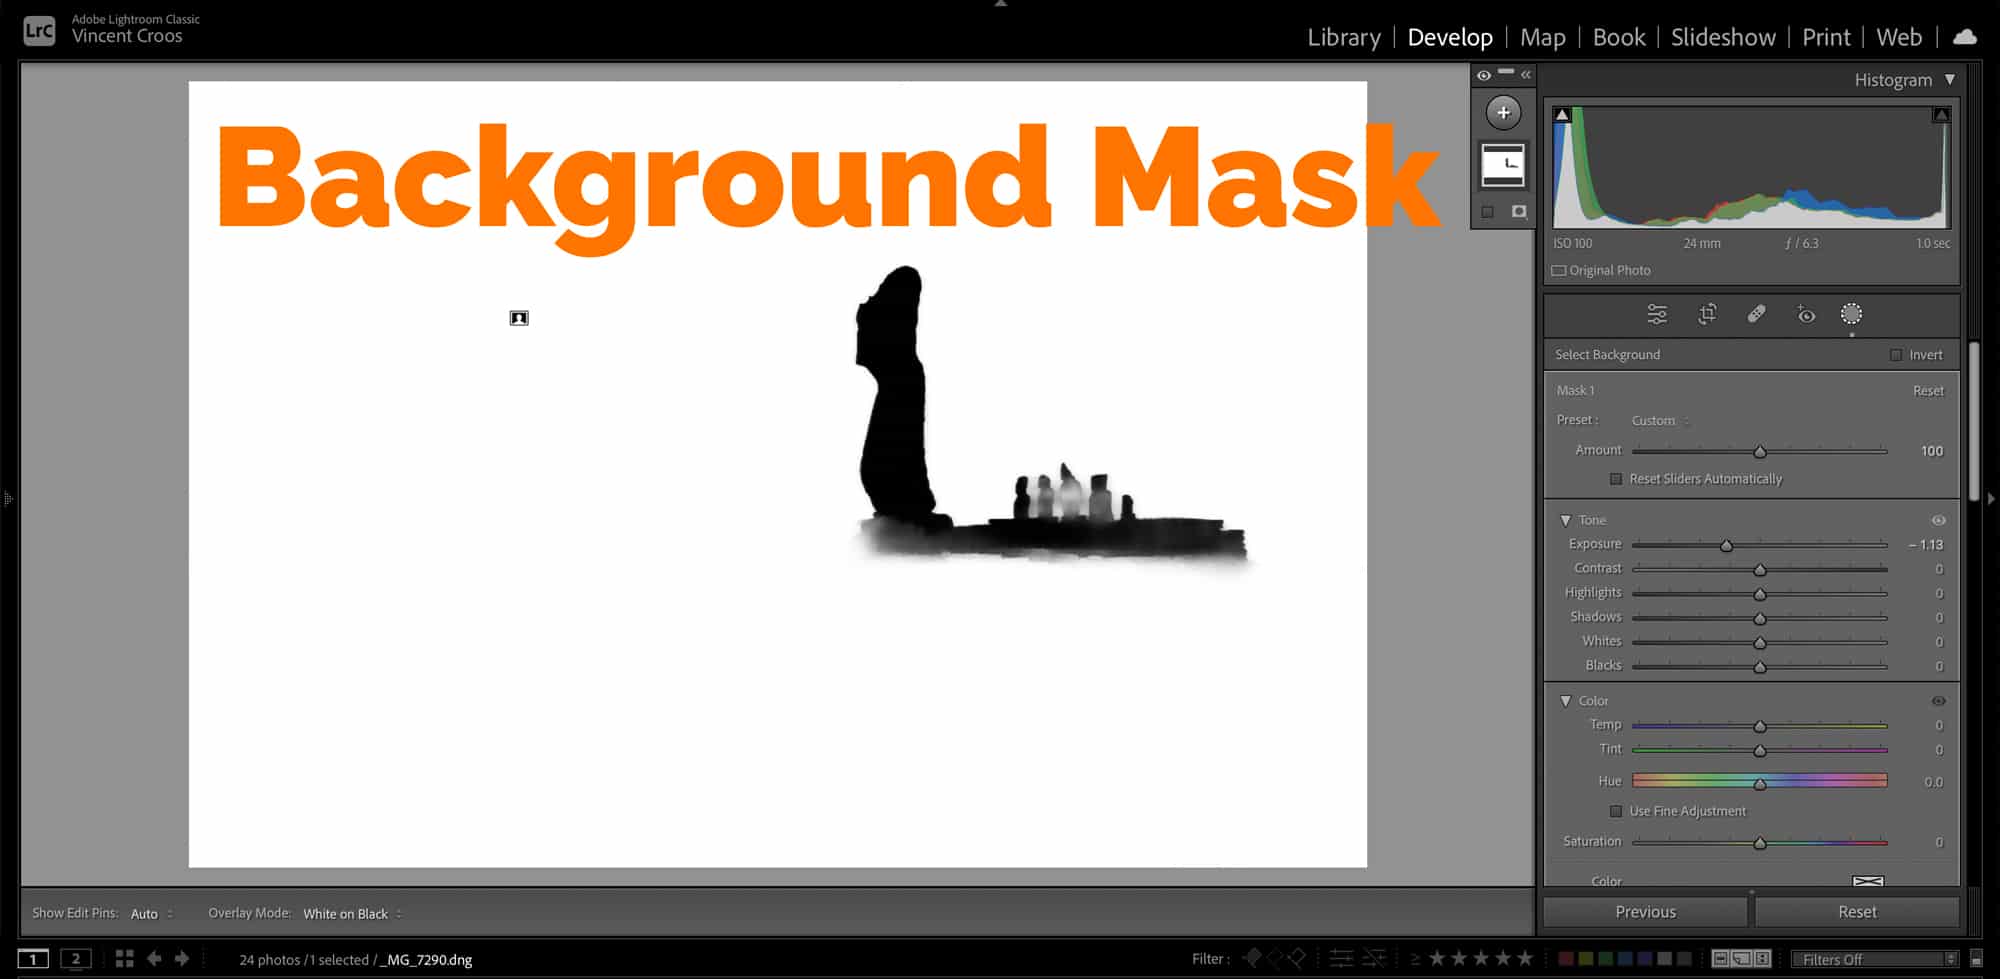
Ask you can see in the background mask image above, the AI masks aren’t always 100% accurate. Sometimes, you need to refine the mask manually.
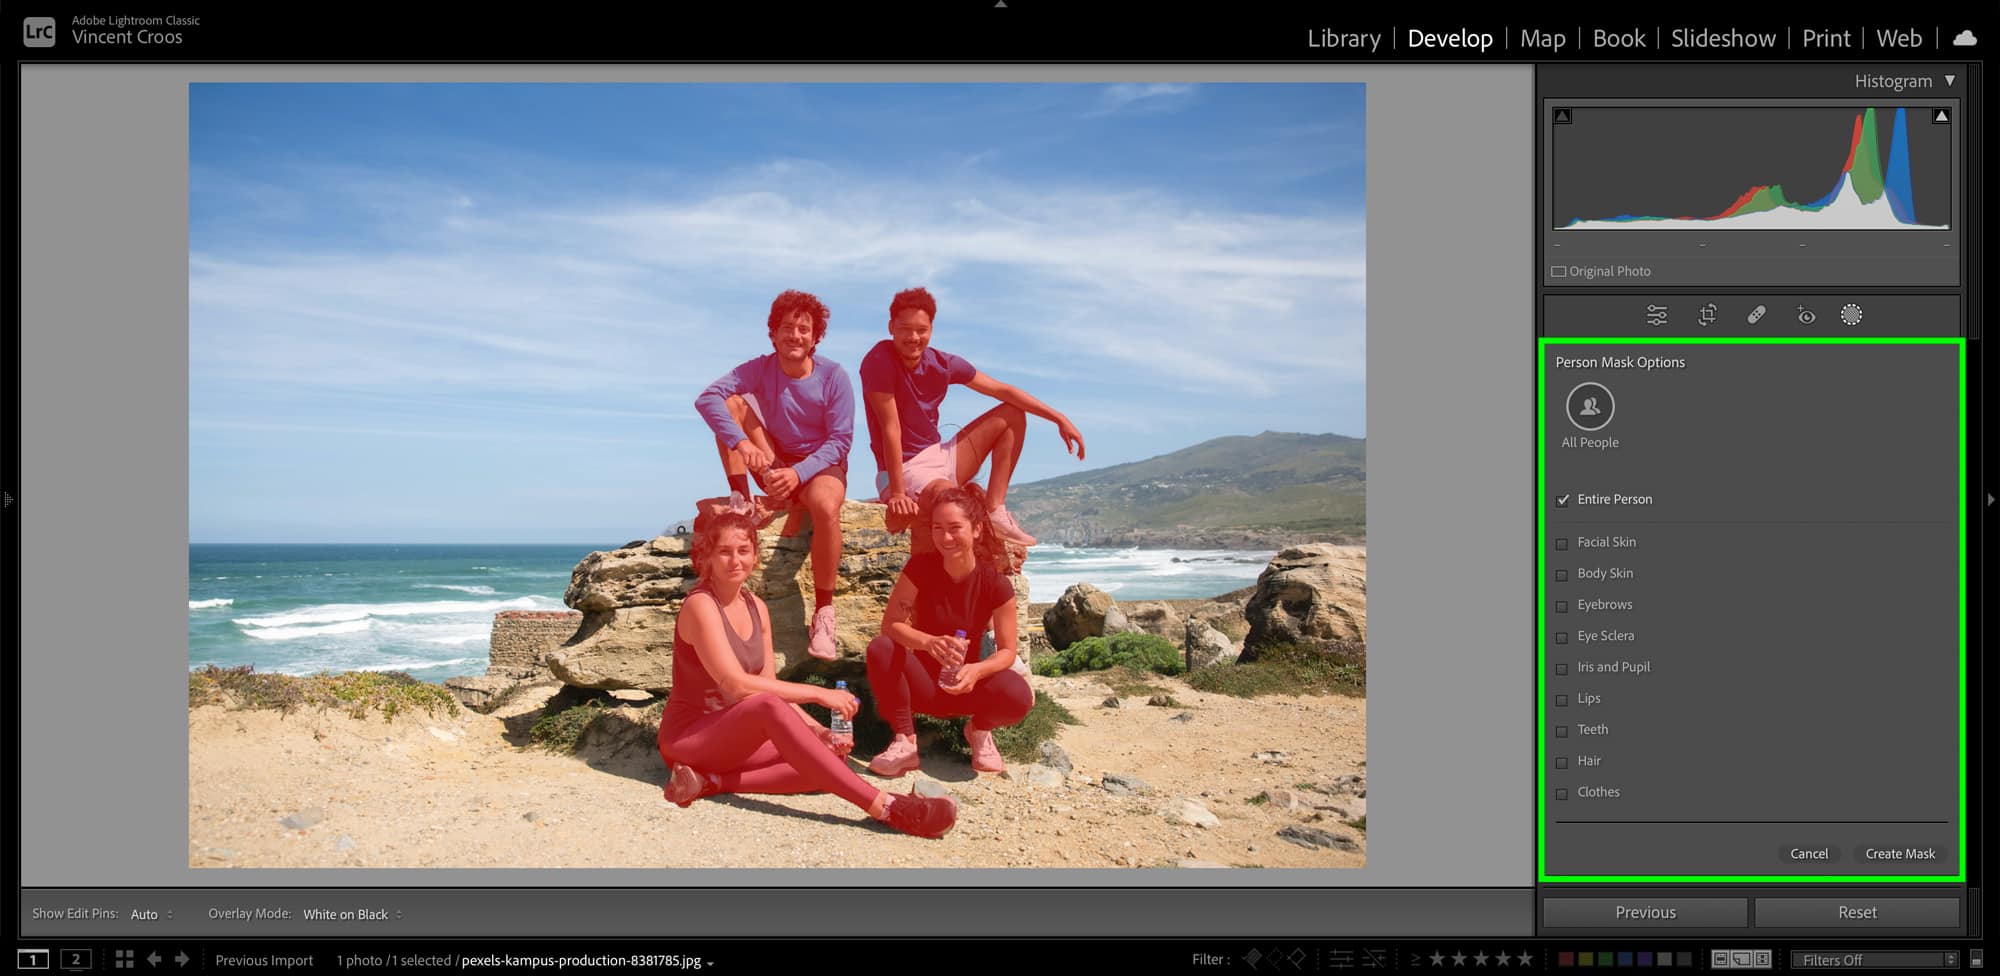
People Mask
The Lightroom Classic people mask is the pinnacle of AI masking.
It allows you to mask one or more people instantaneously. Not only can you choose to mask a person, but you can also choose which body parts and features you want to mask.


Lightroom Classic People Masking Options:
- facial skin
- body skin
- eyebrows
- eye sclera
- iris and pupil
- lips
- teeth
- hair
- clothes
We covered the major masking options in Lightroom Classic. One thing we didn’t cover is adding, subtracting, and intersecting masks. This is better demonstrated with a video tutorial. See the complete masking tutorial for Lightroom Classic on YouTube.

Hola Parceros,
I’m the founder of Aperlust. I enjoy web development and SEO and am into snowboarding and linguistics. In my spare time, you can find me destroying my opponents in chess across the globe.