Last updated on February 19th, 2024
Topaz Video AI is the upgraded version of Video Enhance AI. It has a new code base, several new features, and a name change.
To cut to the chase, is Video AI worth it? Personally, if improving old video quality or upscaling HD video to 4K or 8K is important to you, then it’s definitely worth the hefty price tag — because it works.
However, it comes with a few kinks. Read the Topaz Video AI review for more information.
Related:
Topaz Labs’ only video software, Topaz Enhance AI 4, released in October 2023, received a significant upgrade — they even changed the name to Topaz Video AI. Not a big difference in the name since they only dropped the word Enhance. In this Topaz Video AI review, I’m going to discuss what the major changes are.
But wait, why the name change?
When I first received the email from Topaz Labs on October 19, 2022, about the first version of Topaz Video AI being released, I thought it was a new video software powered by artificial intelligence or machine learning and different from Video Enhance AI.
Without even downloading the software, my first guess was that Video AI would be a creative tool to make your videos pop: color grading, sharpening, filters, etc.
Well, I was wrong.
Indeed, the new and improved Topaz Video Enhance AI is now called Topaz Video AI.
Topaz Video Enhance AI was initially developed to improve interlaced video and upscale video resolution.
In case you don’t know what interlaced video is, it stems from analog video and usually has an i suffix instead of p (progressive). It’s how the video frames load. For example, 480i as opposed to 1080p video.
The noticeable thing about interlaced video is you usually see blurry horizontal lines when the video is played. Progressive videos don’t do this.
For those of you old enough, you’ll remember the interlaced video with those horizontal lines on your CRT televisions.
Video Enhance AI improved the quality of old interlaced video by removing the lines (deinterlacing). In addition, it improved video quality and intelligently upscaled the video resolution up to 7680×4320 pixels (8K).
However, there were a few issues with Video Enhance AI.
Since video is a sequence of constant-rate photos, problems arise when the rate changes, frames repeat, or the scene changes. This limited the amount of AI models available for Video Enhance AI and their overall quality.
After receiving customer feedback and noticing pain points in Video Enhance AI, Topaz Labs had to rewrite the code base to overcome its limitations and provide better AI models. I guess this is also why the name changed to Topaz Video AI.
But Topaz Video AI just isn’t a better-performing Video Enhance AI; it also has new features.
Topaz Video AI Review
Now, I’ll review the new tools of Topaz Video AI.
First of all, Topaz Video AI has a new interface, including a new logo. However, it looks very similar to its predecessor. The main window and previews are in the top-left of the application, and the adjustment and output settings are on the right. The input and output file information is at the bottom.
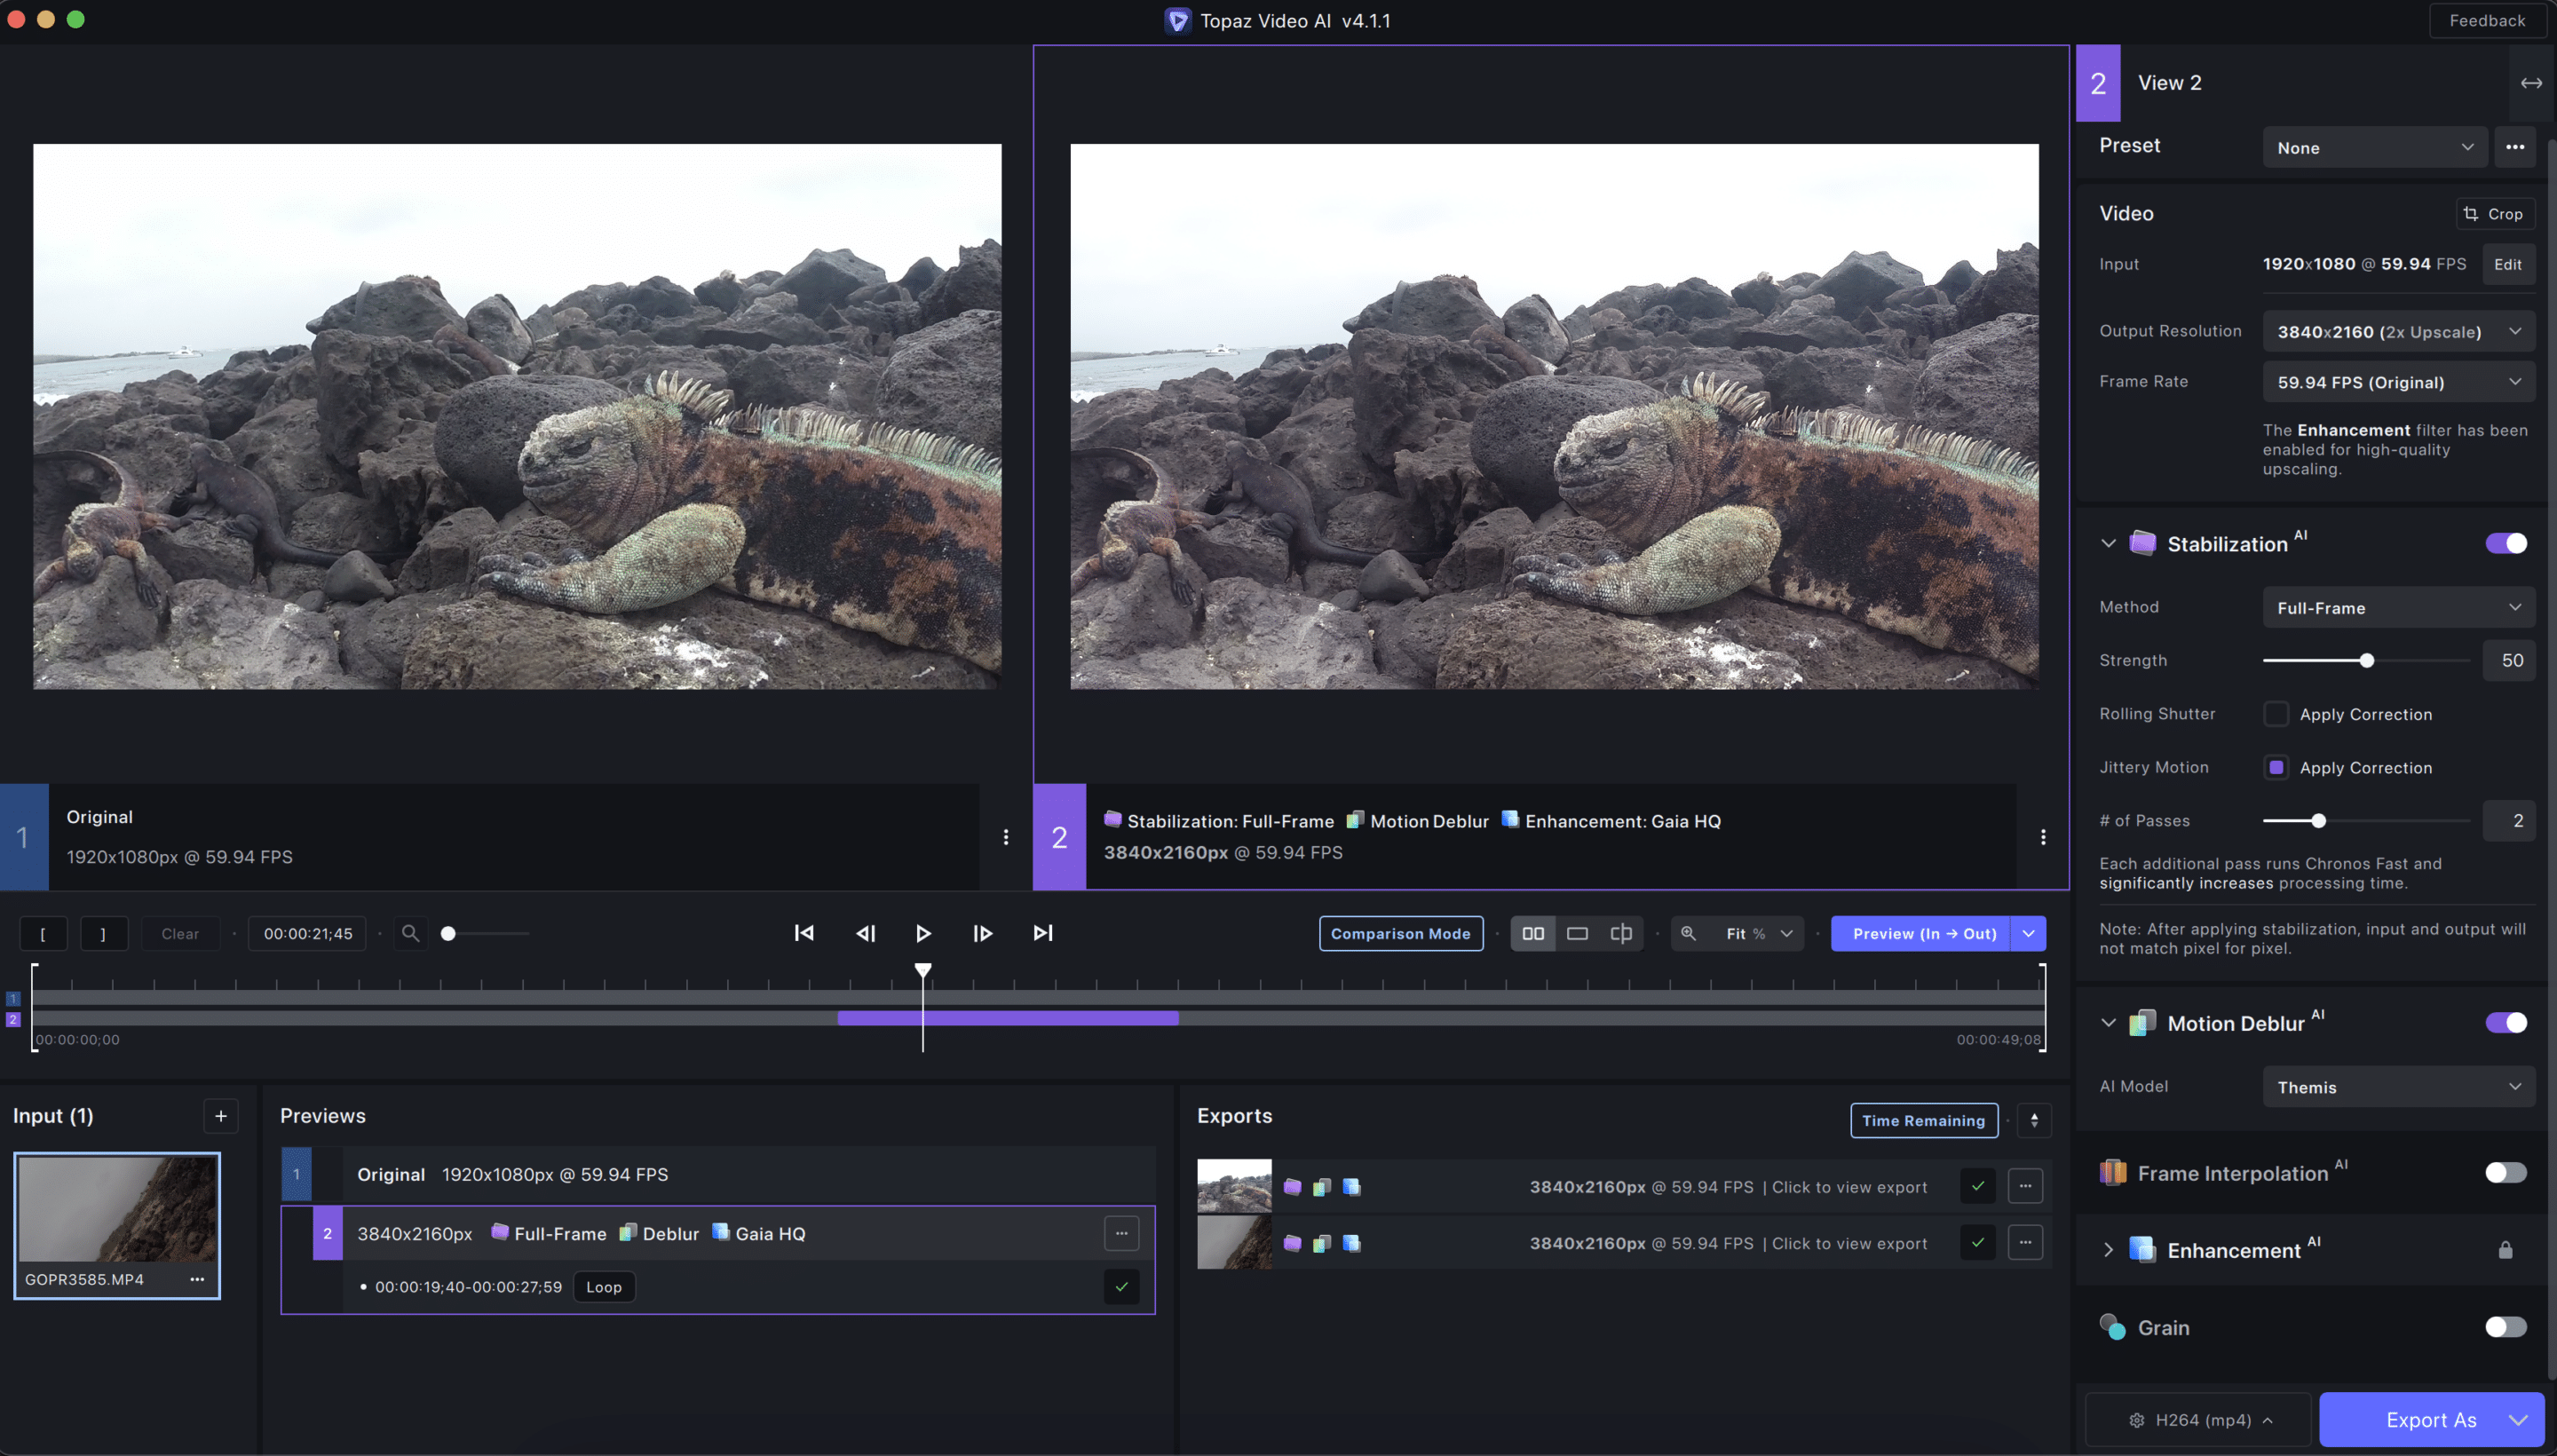
Stack AI models
With the previous update of Topaz Video AI 3.0, you can activate not only one AI model — but multiple models in one job. This allows for more creativity and range in your work. As an example, you could enhance to 4K quality while also adding stabilization and grain.
With filter support, you can run jobs in parallel
Now, users can complete more than one task at a time for increased efficiency. You can create previews from several different input videos, each with unique adjustments, and output multiple projects all at once.
The new filtering choices allow you to show process tasks for selected video files or all input video files. Also, choose to filter by output export jobs, preview jobs, or both.
Command Line
If you’re comfortable with Command Prompt or Mac Terminal, you can run scripts using a command line interface. This is for advanced users and is not recommended. Stick with the GUI.
Topaz Video AI New Features
- Hardware encoding aid for H264, H265, and AV1 on all platforms (when available), and output formats such as ProRes 444 in higher bit rates
- Better colorspace support and color accuracy
- Now supports up to 16-bit color depth.
- The new cropping tool allows for easy and precise editing of videos
- Recently developed a tool to automatically remove letterboxes and pillar boxes from videos
- Improved Trim tool
- Default export and preview preferences can be customized to your needs.
- Supports all standard aspect ratios, as well as vertical videos.
- Internet is not required to use the application. However, you will need a connection to update AI models as they become available.
- You can watch previews in an external media player program.
New Stabilization AI Model to Reduce Shake
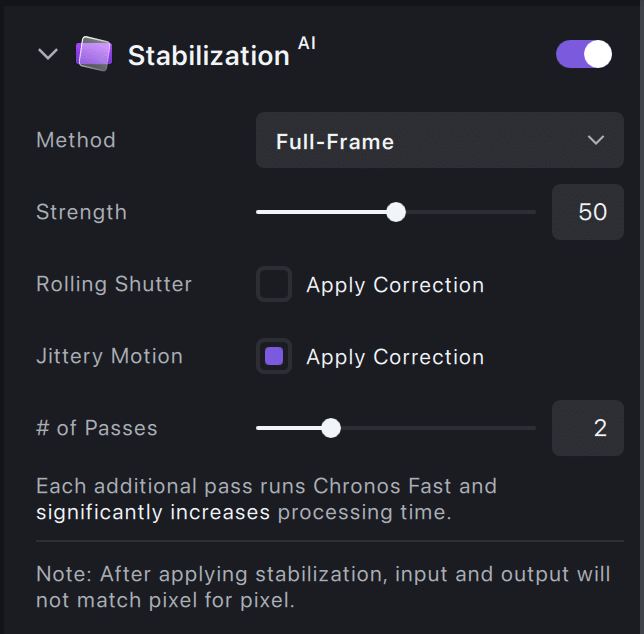
Topaz Video AI offers a new, more reliable form of camera shake reduction that doesn’t count on locating feature pinpoints between frames as other algorithms do. Instead, it considers the whole video frame and creates missing regions using natural language processing to restore framing from any angle — even those not originally captured by your device or app.
The stabilization model will help videographers who don’t use a camera-shake gimbal or adventure filmmakers.
These days, most premium adventure cameras have video stabilization installed on their firmware. However, many older action cams are still utilized today without any video stabilization.
For example, GoPro’s Hypersmooth was only introduced with GoPro Hero 7 Black in 2018. GoPro is an expensive action cam, and I can understand why some people don’t want to dish over the money for a camera upgrade. Luckily, Topaz Video AI helps in this situation for those video cameras that don’t have stabilization.
Motion Deblur AI
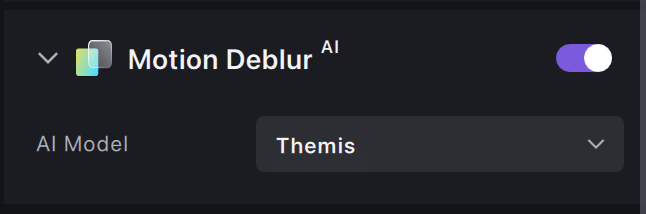
The Motion Deblur AI tool can stack well with the Stabilization AI.
While the Stabilization AI reduces camera shake, it doesn’t reduce motion blur; hence, the reason for Deblur AI. Right now, there is only one AI model: Themis. I suspect there will be more models coming in the future.
Improved Slow Motion with Frame Interpolation AI
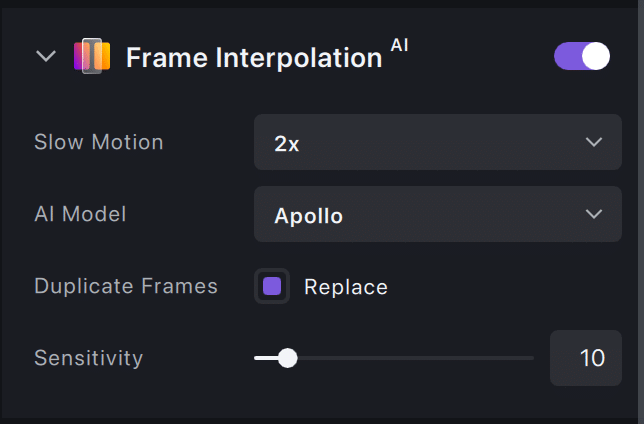
The new Apollo model is an excellent addition to existing slow-motion AI videos.
Like its predecessors, it can create smooth and seamless conversions from frame rate to slo-mo, but this time with more sophisticated training on how nonlinear motion happens as well blurriness caused by technical issues like movement blurs or hand-held camera shots which would otherwise pause during playback because there wasn’t enough data available before deciding where each object should be placed within the video timeline.
This makes sense, considering most people have never seen anything go truly viral, quite like an AI product.
We see that Apollo can now handle various input videos, including those with more complex motion and camera movement. This is a big step forward in terms of the quality of the output videos, and it means that users will be able to create smoother, more realistic slow-motion videos with less effort.
Overall, the introduction of the Apollo AI model is an excellent addition to the existing slow-motion AI video tools on the market, and it should make it easier for users to create high-quality slow-motion videos with less effort.
Topaz Video AI System Requirements
Video editing software is CPU and GPU-intensive. Topaz Video AI is no different, so you’ll definitely need a dedicated GPU. Entry-level desktops and laptops will not cut it.
Windows Minimum Requirements: A DirectX12 compatible GPU (AMD or Nvidia). A 2015+ Intel CPU or a 2016+ AMD CPU. A dedicated GPU with at least 2GB of VRAM.
Mac Minimum Requirements: 8+ GB RAM, 2+ GB VRAM. MacOS 10.14 (Mojave) or 10.15 (Catalina) to run on CPU only. MacOS 10.16 (Big Sur) or newer to have all models run on GPU. This gives the best performance. Topaz Labs apps support M1 processors natively.
Conclusion
If you have blurry, old video footage or are looking to upscale your video resolution, then you should try Topaz Video AI.
The one downside I noticed while testing the Topaz Video is the interface lags. For example, when I press the play or pause buttons, there is a 1 or 2-second delay before the icon changes or the video plays or stops. Maybe it’s just my laptop with the amount of windows open, but I have a 2023 16-inch MacBook M2 Pro.
The software is dedicated to improving video quality, including interlaced video, and it’ll save you time compared to improving the video quality in Adobe Premiere Pro or Final Cut Pro.
Frequently Asked Questions
What is Topaz Video AI?
Topaz Video AI is a flagship video enhancer and upscaler by Topaz Labs. The software can take low-quality video, include VHS-to-digital, and upscale the video to 4K or 8K while improving the detail in the footage.
Designed to coax the very essence of cinematic finesse from standard video files, this innovative software employs the latest in artificial intelligence to transform the way we experience moving images.
How does Topaz Video AI work?
By harnessing the power of high-end neural networks, the software performs pixel-by-pixel analysis and enhancement for unparalleled video upscaling.
Heralding the resolution revolution, it gives your footage an aesthetic upgrade, sharpening details and reducing noise to yield a picture that appears clearer and more detailed than what the naked eye could initially perceive.
Why is Topaz Video AI so slow?
The software is GPU-intensive because it needs to enhance or upscale frame by frame. Think about how long it takes sometimes to upscale a photo with Gigapixel AI — then multiply that by each frame for Topaz Video AI. In the end, to fully utilize the software, you’ll need a high-performance computer.

Hola Parceros,
I’m the founder of Aperlust. I enjoy web development and SEO and am into snowboarding and linguistics. In my spare time, you can find me destroying my opponents in chess across the globe.
Topaz Video AI
Topaz Video AI is the upgraded version of Video Enhance AI. The software's code base received an overhaul. Read the Topaz Video AI review.
Operating System: MacOS, Windows
Application Category: Videography
4.5
Pros
- Easily upscale video without a tech background
- Upscale old VHS and DVD digital video to 4K and 8K resolution
- Improve the quality of video without enlarging the resolution
- Reduces camera shake and blur
Cons
- Requires a high-perfomance computer
- Exporting videos can take several minutes to even hours
- Expensive at $299