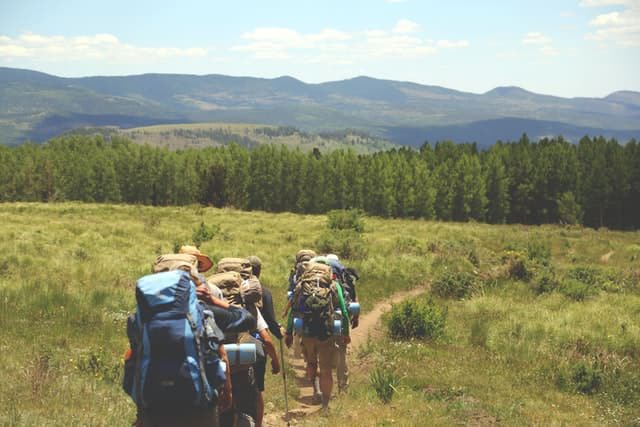
![How to Pack a Backpack for Backpacking Like a Boss [7 Tips]](https://aperlust.com/wp-content/uploads/2021/06/how-to-pack-a-backpack.jpg)
Do you know what sucks?
Stopping in the middle of a trek to get something from your pack, only to discover it’s buried at the bottom.
Unpacking and then repacking everything wastes your time and energy. And if you’re tired, wet, or hot and bothered, then the experience is extra-frustrating.
So how can you avoid these situations? With a well-packed backpack.
Here are 7 tips to getting it right.
How to Pack a Backpack
1. Easy Access
So obvious we almost don’t need to mention it: put the items you use most regularly in easy-access areas on your backpack.
We’re talking snacks, water, sunglasses, maps (if you’re old school), and coats/extra layers for inclement weather.
Make sure you know where these frequently-used items are in your backpack and make sure they’re in an outer pocket — or at least at the top of the main compartment.
Even better is having these items somewhere you can get them without stopping and taking your pack off. Constantly picking up and putting down a heavy pack can get tiring and annoying. Some backpacks have generous pockets on the waist straps, so you don’t have to do this as often.
If yours doesn’t, then that’s fine too — just make sure you know where your essential daily items are.
2. Compartmentalize
Or in other words, sort your items into different groups, put each group in a different container, then pack those containers into your main pack.
So, for example, you might have different containers for:
- Underwear and socks
- Coat and outerwear
- Light clothing
- Food
- Downtime in your tent (charger, e-reader, journal)
For beginners, this might seem more bother than it’s worth — isn’t it much easier to just stuff everything in? But trust us, it pays off on the trail.
How does it pay off? In two ways:
1) If you need a particular item, it is far quicker to find it using the container method. If you know which container it’s in, you’ve instantly ruled out about 80% of your pack for searching, and you only need to look in that one place.
2) If you do need to access the bottom of your pack, it’s a matter of seconds to unpack your whole pack in an organized manner. Just remove your four or five containers, and you’re done. The alternative is taking out every individual item (and probably leaving them in a mess on the ground) while you hunt for that elusive bottle of suncream. Alternatively, many multiday backpacks also have bottom access.
So what do you use for your containers?
Packing cubes explicitly made for this purpose are available. There is, of course, a ton of choice out there in this regard, from expensive branded options to your Amazon Basics. If this is up your street and you have the money, then go for it.
But to be honest, a few old drawstring bags will give you 80% of the functionality for a fraction (or none) of the cost.
Just make sure they’re lightweight and roomy enough for the intended contents.
Plus, ideally one or more of your containers will be waterproof, which brings us to our next tip.
3. Waterproof your Important Stuff
With one or two waterproof containers, you’ll be able to waterproof the stuff that needs it.
If you have high-quality packing cubes, they’ll probably be waterproof anyway. If you’re shoestringing it, a couple of large plastic bags should suffice.
There are two categories of things you should waterproof:
1) Stuff that breaks if it gets wet – e.g., electronics (and possibly food). This should go without saying; no one wants a broken battery pack or a bag of soggy oats.
2) Stuff that ruins your night if it gets wet – e.g., sleeping bags, thermals, and nightclothes.
While getting your day gear wet isn’t much of an issue (it will generally dry as you hike), a set of dry clothes — or at the very least a dry sleeping bag — will mean you can get warm and dry once the day’s hiking is over.
We cannot think of many worse hiking experiences than peeling off cold, wet clothes only to get into a cold, wet sleeping bag. It’s not a good feeling — not to mention potentially dangerous.
And while we’re on the topic of waterproofing:
Line your Pack
This isn’t complicated or technical. Just buy a large trash bag and put it inside your backpack’s main compartment, and then pack everything else inside that large bag. That way, if your pack gets soaked, the stuff inside has a better chance of staying dry. Furthermore, many backpacks come with a rain cover, so lining isn’t always needed unless you’re crossing a river without a bridge.
4. Buy a Water Filter Bottle
We’re trying not to recommend too much expensive tech in this post. But this is one item that really is worth a (small) monetary investment for the time and effort it’ll save you.
Filter bottles allow you to fill up with water whenever you encounter a water source — taking care of all your water requirements with one bottle (as long as there is water en route).
We like to differentiate between two types of filter bottles.
One filters ‘as you drink’. You fill the bottle up, put the cap on, and then suck the water through a filter in the cap.
The other filters all the water in one go. After filling the bottle up, you press a filter down through the bottle (like using a coffee press). You’re then ready to drink as usual.
An important point to consider when choosing a bottle is that you’ll likely find yourself wanting clean water that isn’t for drinking (when cleaning your teeth, washing fruit, or cleaning a cut, for example).
For this reason, we recommend the second type of bottle, as you can pre-filter ‘batches’ of water without having to suck it into your mouth. The Grayl Geopress 24oz is a good option here.
That said, designs like the Grayl are expensive. If this is beyond your budget, then the first type of bottle is fine, but make sure it’s a ‘squeezable’ bottle. This means you can squeeze water from the bottle through the filter without having to suck it into your mouth. One option here is the Katadyn BeFree.
Optionally, you can use a water bladder. Most technical backpacks for the backcountry have a water bladder that can fit a 2 or 3-liter water bladder. Of course, you’ll need to fill it with clean water, and most of them don’t have a filter. The advantage of water bladders is you don’t need to stop hiking or hold them in your hand to take a sip. You drink the water through the hose.
Finally, it’s always worth carrying water purification tablets as a backup, in case you lose your bottle or the filter fails.
5. Weight Distribution
Here’s where we get a bit more technical. How you pack your bag can influence how heavy it feels.
Backpacking wisdom says this:
- Lightweight stuff at the bottom of the pack.
- Heavyweight stuff in the middle at the back, close to your back/spine.
- Middleweight stuff is packed around the heavy stuff and at the top.
However, following these rules is not essential. Sometimes (particularly as a beginner), you’ll find you’ve packed more than you need. In this case, you may simply have to put a heavy item on top of your pack — because that’s the only place it’ll fit. As long as it’s still manageable, that’s fine.
Moreover, you’ll want to balance your weight distribution needs with how frequently you’ll need to access the stuff.
For example, you’ll only need to take your sleeping bag out at night, so the bottom of the pack seems a sensible place to put it. If you’ve got a lightweight sleeping bag, then great, you can follow the weight rules and put it at the bottom of your pack.
But if your sleeping bag’s a bit bulkier, is it worth the inconvenience to pack it in a more weight-friendly fashion? The answer depends on your preferences.
And that’s why if you really want to learn how to pack, the only thing to do is practice.
6. Practice
All this theory is great. But you’ll only properly understand it once you’re out on the trail. For example:
- You’ll only discover how you like to compartmentalize your backpack after you’ve unpacked it several times in a cramped tent after a tiring hike.
- You’ll only know how frequently you need to access an item after you’ve had to take off your pack a bunch of times to retrieve it on the trail.
- And you’ll only discover how much weight distribution affects you after you’ve tried hiking with a heavy tent on top of your backpack.
We all have different preferences, bodies, and backpacks. And that’s why practice-hiking is the best way to get to know your backpack, which brings us to our conclusion and final tip.
7. Don’t Worry if you Mess Up
Following these tips will make your backpacking experience smoother. But equally, don’t obsess over them too much.
You won’t get your packing perfect on the first try — or even the fourth, fifth, or tenth try.
But as long as you’re following common-sense safety guidelines like not drinking dirty water or getting your sleeping bag wet, we advise treating your first hikes (and perhaps even your later ones) as learning experiences. You’re allowed to be a newbie, and you’re allowed to get some basic stuff wrong.
With this beginner’s mindset, you’ll be calmer, more humble, and less likely to criticize yourself when things go awry.
And more than anything, a wise mindset is the key to getting the most from your hikes.
